
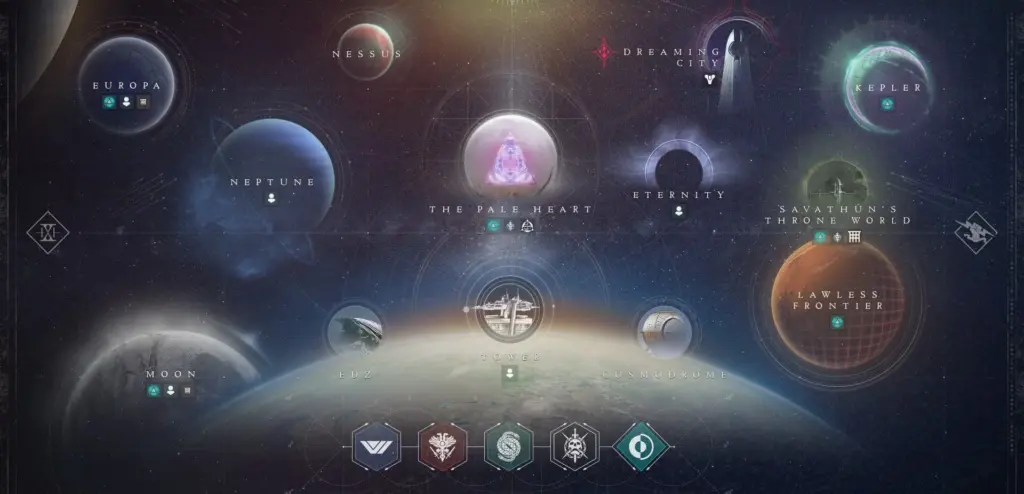
As we navigate through the many years of Destiny 2, the game’s universe continues to expand and evolve in thrilling ways. Since its launch, we’ve witnessed the transformation of Mars, revisited iconic locations from the original Destiny such as the Moon and Old Russia, and ventured into the frozen wastelands of Europa with the Beyond Light expansion. Now, in The Final Shape, we get a new adventure within The Pale Heart.
It seems like after some initial stumbles with the launch of Destiny 2 and the subsequent separation from Activision, the team at Bungie has found their stride. Ever since the launch of Forsaken, Destiny 2 has consistently innovated and adapted. The introduction of new weapons, mods, locations, game modes, and a more focused story has capitalized on the already tight gunplay that the game is known for. It’s now a more cohesive, satisfying, and exploratory experience that is worth going back to again and again.
If you’ve been hesitant to give Destiny 2 a shot, or are a lapsed player who just hated the grind, The Final Shape is a great time to revisit the Tower. With the launch of a next-gen version, we’ve put together these go-to PC and console settings to help you harness the light of the Traveler and lean into the Darkness, to become truly legendary.
Last Update: Not a whole lot has changed in regards to settings for Destiny 2. Bungie has always been incredibly proficient at creating beautiful, intuitive, and refined games meaning that you don’t have to really change anything. The only major changes we’ve seen recently are a slight update to Anti-Aliasing on PC and the ability to separate a charged and standard melee ability. The latter has been a long sought-after update that allows you to separate your ability from a standard melee just by deselecting automatic melee in your settings. Then you can decide to map it to the same button as an extended press or choose a different keybind.

Best Destiny 2 PC Settings

It took a bit longer to make its way to PC, but for many, it was well worth the wait. Destiny 2 is a gorgeous and well-optimized game for PC as long as you have the necessary build to run it. Before diving into specific settings changes, you’ll want to be sure you meet the minimum and even the recommended PC requirements to achieve optimal performance.
Minimum Requirements
- CPU: Intel Core i3, Intel Pentium G4560, or AMD FX-4350
- GPU: Nvidia GeForce GTX 660, GTX 1050, or AMD Radeon HD 7850
- RAM: 6GB
- Hard Drive Space: 104GB
- Operating System: Windows 7, 8, or 10
Recommended Requirements
- CPU: Intel Core i5 or AMD Ryzen R5
- GPU: Nvidia GeForce GTX 970, GTX 1060, or AMD R9 390
- RAM: 8GB
- Hard Drive Space: 104GB
- Operating System: Windows 10
Best Destiny 2 Mouse Settings for PC

Let’s take a look at the best baseline to start with for your mouse settings.
DPI: 400 – 800
As with most FPS titles, the sweet spot for most professional Destiny 2 streamers is in the 400-800 range. With the shooting mechanics being so tight and fluid, you can opt for slightly higher DPI to start with and adjust from there.
Polling Rate: 1000Hz
You’ll want to find a polling rate that compliments your DPI and sensitivity settings. Start with 1000Hz, and adjust the setting based on your mouse performance.
Look Sensitivity: 4 – 6
As we said before, Destiny 2 is designed with incredibly solid shooting mechanics at its core, meaning that accuracy can be retained at higher sensitivity settings. Start in this range and push it higher as long as it complements your DPI and accuracy.
ADS Sensitivity Modifier: 1.0
Keep this at 1 to retain the sensitivity settings you set up between your mouse and in-game settings.
Vertical and Horizontal Inversion: Custom
Keep this off unless you’re used to inverted controls.
Aim Smoothing: Off
Acting somewhat like aim assist, keep this off to improve your skillset.
Best Destiny 2 Keybinds for PC

Destiny 2’s control scheme was designed, first and foremost, with controllers in mind. While it does have one of the best controller keybind setups around, it’ll take a bit of work to get there on keyboard and mouse. Here are our go-to Settings.
- Movement: WASD
- Finisher: Mouse Button 5
- Push-To-Talk: T
- Return to Orbit / Abort: O
- Fire: L Mouse Button
- Reload: R
- Auto Melee: Off
- Melee: C
- Charged Melee: V
- Aim Down Sights: R Mouse Button
- Light Attack: L Mouse Button
- Heavy Attack: R Mouse Button
- Block: C
- Jump: Space Bar
- Toggle Sprint: L Shift
- Toggle Crouch: L Ctrl
- Class Ability: E
- Air Move: X
- Interact: V
- Grenade: Q
- Super: F
- Primary Weapon: 1
- Special Weapon: 2
- Heavy Weapon: 3
- Switch Weapon: ~
- Weapon Scroll: Mouse Wheel
Best Destiny 2 Graphics Settings for PC
Bungie is known for creating visually impressive games. Destiny 2 takes that up a notch with gorgeous backdrops, elegant lighting effects, and varied landscapes across each exploitable planet. With Destiny being a less competitive title, there is room to opt for higher settings on visual elements. That said, you’ll absolutely need to meet the minimum PC requirements to make this work.
Video Settings

Window Mode: Full Screen
Maximize your frames per second by opting into full screen. Boundless or windowed provide other optional benefits, but full screen is best for maximizing frames.
Resolution: 1920 x 1080
For buttery smooth gameplay and the highest FPS, opt for this setting. If you have a 4K monitor, you can push the resolution a bit, but you’ll need powerful hardware to make sure it runs effectively.
VSync: Off
Keep this setting off to avoid screen tearing and input lag.
Frame Rate Cap (Enabled): Off
Keep this off to allow your PC to push for as many frames as possible.
Framerate Cap: 144+
This will automatically populate based on your monitor and PC. If you can, find a combo that hits at least a max of 144Hz.
Field of View: 103 – 105
Expand the FOV just a bit to gain some additional peripheral views without sacrificing mid-screen clarity. Only drop this lower than 103 if you’re struggling to maintain a stable frame rate.
Screen Bounds: Custom
The best option is to fit your screen, but how you set up your display is entirely up to you.
Brightness: Custom
The default brightness is good enough to keep unless you have a difficult time seeing enemies in darker rooms and caverns. That said, the PVP maps are all well lit shouldn’t need many adjustments.
Advanced Video Settings

Graphics Quality: Custom
Switch this to custom to access more advanced video settings.
Anti-Aliasing: SMAA
While FXAA was the original setting we recommended, the SMAA setting has emerged as the natural next step. It’s basically an advancement of the FXAA algorithm but with a more refined logic that identifies specific patterns and blurs them in a given direction. As a Destiny player, you can expect to gain back 2-3 frames as opposed to .5-1 with FXAA.
Screen Space Ambient Occlusion: Off
This setting provides contact shadows when two in-game assets meet or interact, basically meaning that on a pixel-by-pixel basis, it will look more realistic. With Destiny being such a fast-paced and kinetic game, you won’t notice this being off and will reap some significant framerate benefits.
Texture Anisotropy: 8x
Known as anisotropic filtering in other titles, this setting allows for more realistic textures to appear at complex angles. Opting for the 8x setting will assure that your PC isn’t straining to pop in these textures and that they don’t look muddled.
Texture Quality: Highest
Unless you’re dying for frames, you can go ahead and choose the highest texture quality option.
Shadow Quality: Lowest
This makes shadows look more realistic and is a huge performance drain. Go for the low setting to maintain frames.
Depth of Field: Off
Leaving this setting on adds realistic blurring effects to long-distance assets. Keep this off to maintain visual clarity at any viewing distance and save a few frames.
Environment Detail Distance: High
You can keep this at the highest setting to retain those gorgeous backdrops without sacrificing frames.
Character Detail Distance: Medium – High
This setting increases the detail on character models in both PVP and PVE. High is the best option to distinguish enemy characters from the background, but you can choose medium if you need to save some frames.
Foliage Detail Distance: Low
Keep this setting on low, as it adds unnecessary detail to in-game foliage and can be a major performance drain.
Foliage Shadow Distance: Medium
Similar to the last setting, you’ll want to keep this as low as possible.
Light Shafts: Low – Medium
This adds realistic god rays to the game and can cause a dip in framerate at higher settings. Start with low and only bump up to medium if you have frames to spare.
Motion Blur: Off
Keep this off to maintain clarity when running and aiming downs sites.
Wind Impulse: On
This allows for wind from various in-game impacts to affect foliage. You can keep this one on without any performance dips.
Additional Video Settings

Render Resolution: 100%
Keep this at the maximum setting and only drop to a minimum of 90% if you’re experiencing consistent screen tearing and frame rate drops.
HDR: Automatic
If you have an HDR display, this will automatically turn on.
Chromatic Aberration: Off
Another lighting effect that adds a touch of realism. This one is optional, but we recommend turning it off for a slight boost in overall performance.
Film Grain: Off
This is a cinematic effect that has no real impact on performance but can become a visual distraction.
Best Destiny 2 Console Settings

The original home for Destiny and Destiny 2, you can tell that Bungie designed the title to optimize for 8th-gen consoles. This means that, quite often, the defaults are perfectly fine. That said, there are a few tweaks to make here and there, and a few things to consider when swapping to a PS5 or Xbox Series X/S.
Best Destiny 2 Controller Settings for Console

Back in the summer of 2020, Bungie released an update allowing you to remap keybinds on controllers. This release also brought in a handful of excellent preset controller schemes, though it’s still worth exploring some additional changes.
Your button layout choices should follow your playstyle, so use the following list to kickstart your settings exploration.
- Movement: Right Trigger
- Finisher: Right Trigger (Press)
- Fire: Right Trigger (Press)
- Reload: X (Press)
- Auto Melee: Off
- Melee: RB (Press)
- Charged Melee: RB (Long Press)
- Aim Down Sights: Left Trigger (Long Press)
- Light Attack: RB (Press)
- Heavy Attack: Right Trigger (Press)
- Jump: A (Press)
- Toggle Sprint: Left Trigger (Long Press)
- Alternate Weapon Action: X (Long Press)
- Toggle Crouch: B (Press)
- Class Ability: B (Long Press)
- Interact: X (Long Press)
- Grenade: LB (Press)
- Super: LB + RB (Press)
- Swap to Kinetic or Energy Weapon: Y (Press)
- Swap to Power Weapon: Y (Long Press)
Best Destiny 2 Video Settings for Console (Xbox One & PS4)

Unlike the PC version, the video settings options on 8th-generation consoles are virtually non-existent aside from brightness and simple colorblind settings. That said, Bungie has a history with console games exclusively and understands how to optimize a game to take advantage of current hardware.
It may not be as pretty as on PC, but it will still look fantastic for a multi-platform title.
Best Destiny 2 PlayStation 5 and Xbox Series X/S Video Settings

Destiny 2 received an updated version in late 2020 to take advantage of the improved power of the PS5 and Xbox Series X/S. This includes native 4k resolution (Series S hits 1080p), 60fps, faster load times, and cross-generation play, to name only a few features. Now, this update hasn’t opened up the console version to be as customizable as PC. However, it does include the following new video settings that you should be aware of.
120Hz Mode (only for Crucible): On
You need to be sure that your screen is capable of hitting this refresh rate first. If it can, turn it on to uncap your frame rate for PvP.
FOV: 95-105
While PC it’s almost always best to shift as close to 105 as possible, it can be far more taxing on your console. Try a few options between 95 and 105 to see what looks best visually without promoting additional stuttering.
Motion Blur: Off
Motion blur can be far more excessive on console if left on. Keep it off to maintain clarity when running and aiming down sights.
Chromatic Aberration: Off
Like motion blur, this can be far more excessive on console, so keep it off.
Film Grain: Off
Keep this off to avoid visual edge distractions.
Best Destiny 2 Audio Settings for PC and Console

The audio settings between PC and console are virtually the same and follow the same basic setup for optimization. Here’s what we recommend to maintain in-game clarity and quickly identify audio cues when in firefights.
- Voice Output Settings: Headset Only
- SFX Volume: 10
- Dialogue/Cinematics Volume: 7
- Music Volume: 0
- Chat Volume: 8
These are pretty simple settings, but by eliminating music and cranking up SFX and Chat to resonate within your headset, you’ll have a better chance at understanding audio and chat cues without distraction.
Putting it to Practice

Destiny 2 is designed around optimization and meant to look and feel incredibly fluid. The console version reflects this with its lack of customization, showing that Bungie is incredibly proud of their setup. They’re also dedicated to making regular balance changes to provide a better experience for the Destiny Community.
The PC version, on the other hand, allows for enough customization to gain back a few frames. But like the console version, the default blend of visual fidelity and performance really showcases the sound design choices that the folks at Bungie made.
While the title wasn’t perfect at launch, it’s now fully in the (very capable) hands of its creators. And with their dedication and willingness to support it, the original (and possibly best) live service title will only continue to improve.
Related Reading
Destiny 2 Navigation
- Destiny 2: Rite of the Nine Weapons Guide
- Destiny 2: Best Items to Buy from Xur (2025)
- Destiny 2 – New and Best Weapons in Episode: Heresy
- Destiny 2: The 7 Best Seasonal Weapons from Episode: Revenant
- The Best Machine Guns in Destiny 2
- The Best Fusion Rifles in Destiny 2
- The Best Linear Fusion Rifles in Destiny 2
- The Best Grenade Launchers in Destiny 2
- 5 Best Trace Rifles in Destiny 2
- Destiny 2: Best Bows for PVE
- 10 Best Rocket Launchers in Destiny 2
- 10 Best Swords in Destiny 2
- Destiny 2: Best Scout Rifles for PVE
- 10 Best Sidearms in Destiny 2
- 10 Best Submachine Guns in Destiny 2
- 10 Best Sniper Rifles in Destiny 2
- The Best PvE Weapons in Destiny 2
- Destiny 2: Best Auto Rifles for PVE
- 18 Best Hand Cannons in Destiny 2
- 20 Best Pulse Rifles in Destiny 2
- 10 Best Shotguns in Destiny 2
- Destiny 2: The Final Shape – 9 Best Exotic Weapons for PVE
- Destiny 2: The Final Shape Salvation’s Edge Raid – Weapons Guide
- Destiny 2: 9 Best New Weapons in The Final Shape
- Destiny 2: The Best Void SMGs
- Destiny 2: 10 Best Arc Weapons
- Destiny 2: Best Iron Banner Weapons
- Destiny 2: Lightfall – PvP Weapon Tier List
- Destiny 2: The Best Void Weapons
- The Best Weapons for Gambit in Destiny 2
- Destiny 2: Best Kinetic Weapons
- Destiny 2: 18 Best Weapons to Craft Guide
- 10 Best Legendary Weapons in Destiny 2 Ranked Worst to Best
- Destiny 2: Best PVP Weapons
- Destiny 2: 3 Best PVE Builds for Hunter in Episode: Heresy
- Destiny 2: 3 Titan Builds for PVE in Episode: Heresy
- Destiny 2: The 3 Best Warlock PvE Builds for Episode: Heresy
- Destiny 2: Best Prismatic Warlock Builds (PVE)
- 3 Best Prismatic Titan PvE Builds In Destiny 2
- All Destiny 2 Builds (+Some Build Crafting Tips)
- The Best Gunslinger Build in Destiny 2
- Destiny 2: Best Void Hunter Build for PvE & PvP
- Destiny 2: Best Void Titan Build (PvE & PvP)
- Destiny 2: The Best Void Warlock Builds
- Destiny 2: The Best PvP Hunter Build
- Destiny 2: Best Arc 3.0 Titan Build For PvE
- Destiny 2: Best Arc 3.0 Hunter Build For PvE
- Destiny 2: The Best Arc 3.0 Warlock PvE Build
- Destiny 2: Best Titan Solar 3.0 Builds
- Destiny 2: Best Warlock Solar 3.0 Builds for PvE and PvP
- Destiny 2: The Best Hunter Solar 3.0 Build
- Destiny 2: Best Titan Strand Builds for PvE
- Destiny 2: Best Hunter Strand Builds for PVE
- Destiny 2: Lightfall Best Warlock Strand Builds (PVE)
- Destiny 2: The Best Hunter Builds for Every Game Mode
- Destiny 2: The Best Warlock Builds for Every Game Mode
- Destiny 2: The Best Titan Builds for Every Game Mode
- Destiny 2: Cosmetics Explained (How & Where to Get)
- Destiny 2: Coolest Exotic Armor Ornaments for Each Class
- Best Looking Hunter Armor Sets in Destiny 2
- Destiny 2: Best Looking Armor Sets for Warlock
- Best Looking Titan Armor Sets in Destiny 2
- How to Get Bright Engrams in Destiny 2
- Destiny 2: Every Possible Way to Farm Bright Dust, ranked slowest to fastest
- Destiny 2: The 40 Best Shaders Ranked from Worst to Best Looking
- Destiny 2 | The 45 Best Ships Ranked from Worst to Best Looking
- Destiny 2 | Finishers Explained and Ranking Finishers Best to Worst
- The 15 Best Sparrows in Destiny 2, Ranked From Worst to Best Looking
- Destiny 2: Top 10 Best Ghost Shells
- Destiny 2 Transmog System Explained — What to Expect From Armor Synthesis
- How to Unlock Every Salvager’s Salvo Ornament in Destiny 2
- Destiny 2: Revisiting the Sol System – Returning and New Players Guide (2026 and Onward)
- Destiny 2: Solstice Event 2025 Guide
- Destiny 2: Rite of the Nine Weapons Guide
- Destiny 2: Rite of the Nine Event Guide
- Destiny 2: Guardian Games 2025 Guide
- Destiny 2: 3 Titan Builds for PVE in Episode: Heresy
- Destiny 2 – New and Best Weapons in Episode: Heresy
- Destiny 2: The 7 Best Seasonal Weapons from Episode: Revenant
- Destiny 2: The Final Shape Salvation’s Edge Raid – Weapons Guide
- Destiny 2: All New Exotic Armor from The Final Shape
- Destiny 2: 9 Best New Weapons in The Final Shape
- Destiny 2: The Final Shape Legendary Campaign Tips (No Spoilers)
- Destiny 2: Pantheon Event Schedule & Loot Guide
- Destiny 2: Everything You Should Do Before The Final Shape
- Destiny 2: Season of the Wish Weapons Roundup
- Destiny 2: Season of the Witch Activities, Loot Pool, and Deck of Cards
- Destiny 2: Season of the Witch Best New Weapons and Rolls
- Destiny 2 Arc 3.0 Changes: Aspects and Fragments
- Destiny 2: Season of the Deep Weapons Roundup
- Destiny 2 Lightfall: PvE Weapon Tier List
- Destiny 2 Events Calendar: PvE, PvP, Xur (2026)
- Destiny 2: Lightfall and Season of Defiance New Weapons & God Roll Guide
- Destiny 2 Lightfall New Changes: Loadouts, Guardian Ranks, Vanguard Mode, Artifact Perks, New Mod System
- Destiny 2: All New Weapons in Season of the Seraph and God Rolls
- Destiny 2: All 17 Season of the Plunder Weapons
- Destiny 2 Iron Banner Explained
- Destiny 2: Season of the Haunted Weapons Guide
- Destiny 2 State of the Game 2022: Post-Witch Queen
- Destiny 2: Every New Weapon and Armor Set in the Bungie 30th Anniversary Event
- Destiny 2 Bungie 30th Anniversary Event Explained — Halo Weapons and More
- Destiny 2 Festival of the Lost — Everything You Need to Know
- Destiny 2’s Solstice Event Explained
- Destiny 2 | New Override Activity Explained (Season of the Splicer)
- Destiny 2 | Season of the Splicer | All New Weapons and How to Get Them
- All Destiny 2 Builds (+Some Build Crafting Tips)
- Destiny 2: Claws of Ahamkara Stasis Warlock Build Guide
- Destiny 2: Eye of Another World Solar Warlock Build Guide
- Destiny 2: Mask of the Quiet One Solar Titan Build Guide
- Destiny 2: Second Chance Void Titan Build Guide
- Destiny 2: Renewal Grasps Stasis Hunter Build Guide
- Destiny 2: Graviton Forfeit Void Hunter Build Guide
- Destiny 2: Raiju’s Harness Arc Hunter Build Guide
- Destiny 2: Shinobu’s Vow Arc Hunter Build Guide
- Destiny 2: Oathkeeper Hunter Stasis Build Guide
- Destiny 2: Gyrfalcon’s Hauberk Void Hunter Build Guide
- Destiny 2: Lucky Raspberry Arc Hunter Build Guide
- Destiny 2: Wormgod Caress Solar Titan Build Guide
- Destiny 2: Dawn Chorus Solar Warlock Build Guide
- Destiny 2: Cenotaph Mask Solar Warlock Build Guide
- Destiny 2: Doom Fang Pauldron Void Titan Build Guide
- Destiny 2: Rain of Fire Solar Warlock Build Guide
- Destiny 2: The Path of Burning Steps Solar Titan Build Guide
- Destiny 2: Secant Filaments Void Warlock Build Guide
- Destiny 2: Osmiomancy Gloves Stasis Warlock Build Guide
- Destiny 2: Celestial Nighthawk Solar Hunter Build Guide
- Destiny 2: Star-Eaters Scales Strand Hunter Build Guide
- Destiny 2: HoarFrost-Z Stasis Titan Build Guide
- Destiny 2: Felwinter’s Helm Strand Warlock Build Guide
- Destiny 2: Best Items to Buy from Xur (2025)
- Destiny 2: The Final Shape – 9 Best Exotic Weapons for PVE
- The 9 Most Fun Exotics to Use in Destiny 2
- Destiny 2 Witch Queen: 5 Best Exotic Armor Pieces
- Destiny 2 Witch Queen All Exotic Weapons Ranked
- Destiny 2 Beyond Light: 5 Best Exotic Weapons
- Destiny 2: The Best Exotic Armor from Beyond Light
- Destiny 2: Exotics from the Lightfall Expansion, Ranked
- Destiny 2 Shadowkeep: Best Exotic Weapons and Armor
- Destiny 2: All Red War Exotics Ranked
- Destiny 2: Forsaken Exotics Ranked
- Destiny 2: Best Exotic Hand Cannon, Ranked (PvE & PvP)
- Destiny 2: Best Exotic Auto Rifle, Ranked (PvE & PvP)
- Destiny 2: Best Solar 3.0 Exotic Armor and Weapons
- Destiny 2: The Best Exotics | Every Weapon Type
- Destiny 2: Witch Queen Exotics — All Exotic Armor and Weapons
- Destiny 2: 10 Best Weapons to Buy With an Exotic Cipher
- Destiny 2: How to Get the Forerunner Sidearm and Catalyst (Halo Pistol)
- Destiny 2: How to Unlock Ager’s Scepter Exotic Trace Rifle (Complete Questline)
- All Destiny 2 Exotic Quests Ranked by Reward (+ How to Complete Them)
- 20 Best Titan Exotics in Destiny 2
- 20 Best Hunter Exotics in Destiny 2
- 20 Best Warlock Exotics in Destiny 2
- Destiny 2: How to Get Pinnacle Rewards in Episode: Revenant
- Destiny 2: Silver Leaves and Silver Ash Farming Guide
- Destiny 2: The Best XP Farming Methods
- Destiny 2: How to Farm Artifice Armor and Why You Should
- Destiny 2: Best and Worst Lost Sectors to Farm
- Where to Farm in Destiny 2: Farming Guide
- Destiny 2 Gambit Guide: Tips on How to Gain Infamy Rank Quickly
- How to Farm Gunsmith Materials in Destiny 2
- Destiny 2: Enhancement Core Farming Guide
- Destiny 2: 9 Fastest Ways to Farm Glimmer
- Destiny 2 | Planetary Resources Farming Guide
- Destiny 2 | Leveling Guide: How to Reach Max Power Cap Fast
- Destiny 2 Legendary Shards Guide: How To Farm and Spend
- Destiny 2 Exotic Farming: Best Way to Get Exotics
- Destiny 2: Revisiting the Sol System – Returning and New Players Guide (2026 and Onward)
- Destiny 2: Complete Subclasses Guide
- 10 Things We Wish We Knew Before Playing Destiny 2
- Destiny 2: How To Generate Orbs Of Power
- Destiny 2: How to Open Engrams
- How to Unlock Subclasses in Destiny 2
- Destiny 2 Cross Play Explained: How Bungie’s New Unified System Works
- The 7 Best Destiny 2 Streamers to Watch Ranked by Popularity
- Destiny 2 Bounties Guide: How to Get and Track Them
- Destiny 2: The Ultimate Beginner’s Guide
- The Entire Destiny 2 Story Explained (Through The Final Shape)
- Destiny 2 Classes Explained: Subclasses, Abilities, Supers Guide
- Best Destiny 2 Settings for PC & Console
- 4 Best Warlock Exotic Class Item God Rolls in Destiny 2
- 4 Best Hunter Exotic Class Item God Rolls in Destiny 2
- 4 Best Titan Exotic Class Item God Rolls in Destiny 2
- Destiny 2: Best Exotic Armor for GM Nightfalls
- Destiny 2: How to Get Threaded Needle & God Roll
- Destiny 2: How to Get Jurassic Green & God Roll
- Destiny 2: Retrofit Escapade God Rolls (PvE & PvP)
- Destiny 2: Unwavering Duty God Rolls (PvE and PvP)
- Destiny 2: Typhon GL5 God Rolls (PvE and PvP)
- Destiny 2: Dead Man’s Tale Exotic God Rolls and Perks
- Destiny 2: Biting Winds God Rolls and Best Perks
- Destiny 2: CALUS Mini-Tool God Rolls and Best Perks
- Destiny 2: Something New God Rolls (PvE and PvP)
- Destiny 2: Compass Rose God Rolls and Best Perks
- Destiny 2: Get Randy’s Throwing Knife God Rolls
- Destiny 2: How to Get Hawkmoon and God Roll
- Destiny 2: How to Get the Gnawing Hunger God Roll
- Destiny 2: The Best Perks for The Enigma and God Roll
- Destiny 2: How to Get Dire Promise and God Roll
- Destiny 2: How to Get Fatebringer
- Destiny 2: How to Get Ascendant Shards
- Destiny 2: How to Get the Gjallarhorn and Gjallarhorn Catalyst
- Destiny 2: How to Get The Palindrome and the God Roll
- Destiny 2: How to get the Truthteller and the God Roll
- Destiny 2: How to get the Ikelos SMG and the God Roll
- Destiny 2: How to Get Seventh Seraph Weapons and the God Rolls
- Destiny 2: How to Get Falling Guillotine and the God Roll
- Destiny 2: Revisiting the Sol System – Returning and New Players Guide (2026 and Onward)
- Destiny 2: Sparrow Racing League – All Triumphs and Rewards
- Destiny 2: The 7 Best Characters in the Franchise (Red War to Final Shape)
- The 9 Most Fun Exotics to Use in Destiny 2
- Destiny 2: The Final Shape Legendary Campaign Tips (No Spoilers)
- Destiny 2 Guide
- Destiny 2: All Artifacts Ranked
- Destiny 2: Strongest Bosses, Ranked in Terms of Memorability
- Destiny 2: All Expansions, Ranked Worst to Best
- Destiny 2: Ghost Shell Mods Guide
- Destiny 2 – Deepsight Resonance Weapons & How to Get Them
- Destiny 2: All Currency and Materials Ranked
- Destiny 2 The Witch Queen: All Lucent Moth Locations
- Destiny 2 Gambit Changes Explained: Witch Queen Update
- Sony Buys Bungie for $3.6 Billion: What Does This Mean for Destiny 2?
- Destiny 2 | Essential Apps, Trackers, Websites, and Other Resources
- How to Make a Clan in Destiny 2
- The 8 Best Destiny 2 Clans: Who’s Who in the Destiny Scene
- All Destiny 2 Planets Ranked From Worst to Best
- Destiny 2: The Best Loadouts for Nightfalls (2025)
- Destiny 2: All New Exotic Armor from The Final Shape
- All Destiny 2 Builds (+Some Build Crafting Tips)
- Destiny 2: All Armor Mods and Armor Charge Analyzed
- Destiny 2: Complete Subclasses Guide
- Destiny 2 – Deepsight Resonance Weapons & How to Get Them
- Destiny 2: Best Ways to Level Up Crafted Weapons
- Destiny 2 Solar 3.0 Guide: Best Aspects and Fragments
- Destiny 2: Strand Subclass Guide | Unlock, Keywords, Aspects & Fragments
- Destiny 2: How to Unlock Weapon Patterns
- Destiny 2: How to Get Ascendant Shards
- Destiny 2: Best Stats for Warlock
- Destiny 2: Best Stats for Titan PvE
- Destiny 2: Best Stats for Hunter PvE
- Destiny 2: Arc 3.0 Guide
- Destiny 2: Class Guide for PvE and PvP (Including Arc 3.0)
- Destiny 2 Void 3.0 All Aspects and Fragments Explained
- How Weapon Crafting Works in Destiny 2 — Witch Queen Guide
- The Best PvE Armor in Destiny 2
- Destiny 2 | A Complete Guide to Masterwork Weapons
- Destiny 2 | Everything You Need to Know About Adept Mods and Weapons
- Destiny 2 Weapon Stats Explained: Everything You Need to Know
- Destiny 2 Armor Stats Explained: Everything You Need to Know
- Destiny 2: The 10 Best Scout Rifles for PVP
- Destiny 2: Best Crucible Weapons by Class (PVP Guide)
- Destiny 2: 10 Best Sniper Rifles for PVP, Ranked
- Destiny 2: The 10 Best SMGs for PvP
- Destiny 2: Best Crucible (PvP) Armor For Each Class
- Destiny 2: Best Exotic Hand Cannon, Ranked (PvE & PvP)
- Destiny 2: Best Exotic Auto Rifle, Ranked (PvE & PvP)
- Destiny 2: Best Heavy Weapons for PVP
- Destiny 2: Lightfall – PvP Weapon Tier List
- Destiny 2: Class Guide for PvE and PvP (Including Arc 3.0)
- Destiny 2: All Crucible Maps, Ranked
- Destiny 2 Iron Banner Explained
- Destiny 2 Trials of Osiris Ranks and Points Guide
- Destiny 2: Top 11 Tips to Go Flawless in Trials of Osiris
- Destiny 2: 15 Best Weapons for Trials of Osiris (Reworked Edition)
- Destiny 2: New Trials of Osiris Changes Explained
- All Destiny 2 Crucible Game Modes Ranked from Worst to Best
- Destiny 2: Best PVP Weapons
- Destiny 2: The 3 Best Warlock Prismatic Builds for PVP
- All Destiny 2 Builds (+Some Build Crafting Tips)
- Destiny 2: Best Void Hunter Build for PvE & PvP
- Destiny 2: Best Void Titan Build (PvE & PvP)
- Destiny 2: The Best PvP Titan Build
- Destiny 2: The Best PvP Warlock Build
- Destiny 2: The Best PvP Hunter Build
- Destiny 2: Best Warlock Solar 3.0 Builds for PvE and PvP
- Destiny 2: Best Strand PVP Build for Each Class
- Destiny 2: Sundered Doctrine Dungeon Loot Table and Guide
- Destiny 2: How to Get Slayer’s Fang
- Destiny 2: The Best Loadouts for Nightfalls (2025)
- Destiny 2: How to Get Pinnacle Rewards in Episode: Revenant
- Destiny 2: The Final Shape Salvation’s Edge Raid – Weapons Guide
- Destiny 2: Pantheon Event Schedule & Loot Guide
- Destiny 2: Warlord’s Ruin Loot Table & Guide
- Destiny 2: Crota’s End – Loot Table & Secret Chests
- Destiny 2: Crota’s End – All Weapons Ranked & God Rolls
- Destiny 2: Crota’s End Armor Sets
- Destiny 2: Exotic Mission Rotator Guide and Loot Pool
- Destiny 2: Ghosts of the Deep Loot Table and Secret Chests
- Destiny 2: Proving Grounds Grandmaster Strike Guide
- Destiny 2: Lightfall Root of Nightmares Raid Guide
- Destiny 2: Lightfall Legendary Campaign Missions Guide and Tips
- How to Get the Spoils of Conquest in Destiny 2
- Destiny 2: Spire of the Watcher Loot Guide
- Destiny 2: Spire of the Watcher Dungeon Guide
- Destiny 2: King’s Fall Guide
- Destiny 2: Vox Obscura Guide
- Destiny 2: Nightmare Containment Guide
- Destiny 2: All Duality Dungeon Weapons
- Destiny 2: Duality Dungeon Guide
- Destiny 2: Dungeons Ranked From Worst to Best
- Destiny 2: Grasp of Avarice Dungeon Guide Walkthrough
- Destiny 2 Dares of Eternity Explained — Bungie 30th Anniversary 6-Player Activity
- All 15 Destiny 2 Strikes Ranked Easiest to Hardest
- Destiny 2 Presage Mission Walkthrough — How to Get Exotic Scout Rifle Dead Man’s Tale
- Destiny 2: All New Exotic Armor from The Final Shape
- Destiny 2: Every Super Ranked for PvE
- Destiny 2: Void Grenades, Ranked
- Destiny 2: The Witch Queen All Glaives Ranked and Explained
- 15 Best Weapon Perks in Destiny 2, Ranked
- Destiny 2: Best Armor Mods Ranked
- Every Destiny 2 Season Ranked Worst to Best
- The Best Destiny 2 Stasis Aspects Explained and Ranked
- The Best Destiny 2 Stasis Fragments Explained and Ranked
- Every Destiny 2 Hunter Subclass Ranked From Worst to Best
- Every Destiny 2 Warlock Subclass Ranked From Worst to Best
- All Destiny 2 Raids Ranked From Worst to Best (2026)
- Every Destiny 2 Titan Subclass Ranked From Worst to Best


Amazing settings recommendations it vastly improved my pvp gameplay!