
Image: Coffee Stain Studios / Jeffrey Hsu
Having learned how to play video games before he could walk or read, Jeffrey is a gaming zealot. With a fixation on efficiency and details, he'll d... Read more
Reviewed by Benjamin Barr
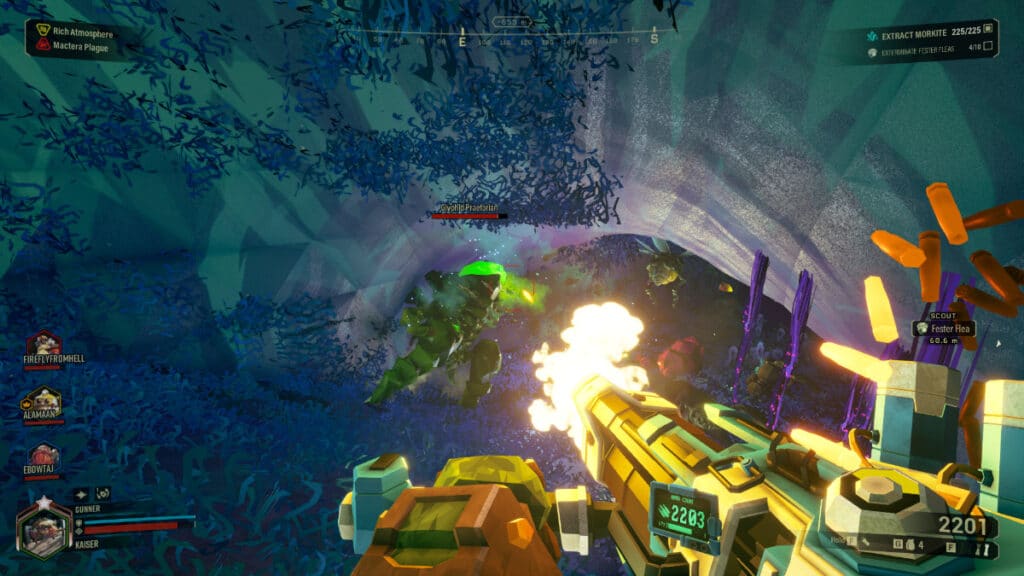
Securing the mining rights to Hoxxes IV has been a challenge. The locals are a bunch of dwarf-eating bugs and plants, and your corporate competitors have sent killer robots to the planets. Negotiations have been difficult to say the least, but luckily, the Gunner is a master of negotiating. With violence.
Armed to the brim with a selection of heavy ordnance, the Gunner is the go-to dwarf for shredding a path through soon-to-be corpses with a flurry of bullets and explosives. A good Gunner keeps their team safe, so they can keep the loot safe.
However, due to the diversity of threats your team will encounter, knowing where to position and which enemies to prioritize will determine if you make it out alive.
To that end, we’ve created our most comprehensive Gunner’s guide on everything Gunner-related in Deep Rock Galactic. We’ll go over what’s expected of your role, the best builds for the Gunner, how to utilize your equipment, and other tips and tricks to help you subjugate the threats of Hoxxes IV.
Let’s get started!


Role of the Gunner Class
As the Gunner, it’s your job to be wherever there’s a threat that can be killed, and there are a lot of threats in Deep Rock Galactic. You’re responsible for ensuring that your teammates can safely do their job by rendering anything hostile into a fine mist.
Tactical Killing Machine
With the firepower and (more importantly) the ammo reserves to keep up a constant barrage, you’re the team’s main source of damage. You may not do as much burst damage as the others, but while their guns run dry, yours should still have plenty of ammunition.
Of course, that doesn’t mean you can afford to be inefficient with your ammo. Always aim for weakpoints whenever possible. This is typically the head, butt, or some other glowing part on the enemy. On higher difficulties, this is crucial for ensuring you can take out threats fast enough before you get overwhelmed.

As for which threats to prioritize, this general list should account for most situations:
- Disablers (Leeches, Grabbers, Trawlers) – Simply being grabbed by these enemies will incapacitate a dwarf until a teammate shoots them free. Bring them down before one of your team gets kidnapped.
- Ranged enemies (Spitters, Menaces, Turrets): These types of enemies deal high damage and will quickly pick off your team if they’re not dealt with in time. Plus, they’re often out of range of your teammates’ weapons.
- Spawners (Breeders, Brooder Nexus): These will infinitely produce smaller enemies until killed. The constant damage and wasted ammo will kill your team if not dealt with.
- Flying enemies (Mactera, Shredders, Patrol Bots): Rather annoying enemies that are difficult to find cover from. Depending on the range they’re flying at, your teammates can deal with them. But if they’re keeping a distance, you’re usually the best choice.
- Melee enemies (Grunts, Rollers, Praetorians): The Driller should be able to mostly handle these, just help out if they’re overwhelming your team (especially on higher difficulties). Don’t bother with breaking the armor on bulkier enemies, it’s normally just a waste of ammo. Your Scout should be able to flank them to reach their squishy weakpoints.
- Mini-bosses (Detonators, BET-C, Nemesis): While these are major threats, they’re typically slow and can be kited in most cases. You’re much more likely to die from being swarmed by smaller normal enemies. When you confront these, ideally there won’t be an active swarm. If there is, disengage and deal with the swarm first.
Utility & Protection
Thankfully, you can also provide your team much needed breathing room through tactical usage of your Zipline Launcher and Shield Generator. The first provides your team a way to safely hang in the air away from melee enemies and traverse steep inclines, while the second grants a few seconds of near-complete protection to revive teammates or regroup.

Outside of direct combat, you’re often near the forefront clearing a path forward or serving as overwatch in a large area against any potentially spawning threats. Unfortunately, your team won’t always be able to stick together, so you’ll often have to make a judgment call on where you’re most effective.
To that end, focus on maintaining sight lines to see/hit enemies and actually being able to reach your teammates to assist them if they’re in trouble. Setting up ziplines can tremendously help by enabling your team to traverse sheer cliffs and gaping chasms or to just reconvene if you get split up.
Otherwise, spend the rest of your free time mining and carrying as many valuable minerals as you can. Especially that ever-precious, ammo-creating Nitra. Though with that being said, you’ll barely have any downtime on the higher Hazard difficulties, as swarms tend to be massive and much more frequent.
Best Gunner Perks
You’re fairly flexible with your perk choices as the Gunner and can mostly choose whatever you want. Here are a few recommendations to augment his playstyle:
Active Perks
- Dash: As you’re the least mobile of the four classes, it’s imperative you don’t get cornered and overwhelmed. This lets you easily get out of danger and get some breathing room.
- Field Medic: Your Shield Generator won’t last forever. The sooner you can get someone up the better. Plus, the free revive is always amazing for emergency situations.
- Iron Will: Sometimes everything just goes to hell and everyone goes down trying to get each other up. Activate this, throw out a Shield Generator, and get someone else up. Your team might just make it with this second chance.
- Beast Master: Having a friendly creature take some aggro off you while dealing with other enemies is always appreciated. Especially as you’re usually fairly stationary while firing your primary weapon.
Passive Perks
- Born Ready: While not all of the Gunner’s weapons have a reload mechanic, the ones that do often require a fair bit of time. Simply switch to your Shield Generator and run away for a bit to fully reload your arsenal.
- Resupplier: While you have a lot of ammo, you need to resupply eventually. Get back in the fight quicker and with more health.
- Friendly: The Thunderhead and Hurricane primary weapons have a bit of splash damage. Best to not kill your team in the process.
- Sweet Tooth: Expect to be hit quite a bit while you’re firing your primary. This should help offset some of the damage.
Related Reading: Best Perks Overall for Deep Rock Galactic
Gunner Primary Weapons & Builds
You like big guns and cannot lie. That’s why all three choices for the Gunner are heavy weapons that excel at mid-range combat. Each one is capable of sustained continuous fire due to their large ammo reserves, and you’ll be blowing through enemy ranks and armor alike. Just be aware that your move speed will slow to a crawl while firing these guns.
1. “Lead Storm” Powered Minigun

Lead Storm is the default starting weapon of the Gunner and one of the best guns in Deep Rock Galactic. If you’re looking for a versatile weapon that’s good in nearly every scenario, this is your gun.
Capable of spewing non-stop lead after a brief spin up, this minigun becomes more accurate the longer you fire it. In addition, each bullet has a chance to briefly stun on impact, making it great for stopping meatier enemies in their tracks.
Due to its steady stream of bullets, it’s fantastic for devastating weakpoints as long as you can maintain line of sight. Just make sure to account for the bullet spread at greater distances.
The only real limitation on this weapon is it its heat meter (indicated by the filling circle on your gun). Fire too long without a break, and it’ll overheat, shutting down for a few seconds. However, this can be easily managed by pausing and using that time to reposition before firing again.
Build A: Lead Storm Lead Storm (Recommended)
No, we did not just write the weapon’s name twice. The overclock on this build just shares the exact same name as the gun itself (and for good reason too). To put it simply, this build makes you a stationary turret of death.
You’re effectively unable to move while firing the gun, and your stun potential drops considerably. However, in exchange, you put out a stupid amount of damage. And thanks to our mod selection, you’ll have bullet penetration to deal with hordes and the accuracy needed to consistently target weakpoints.
While the movement penalty is annoying, it can be somewhat negated by constantly bunny hopping everywhere. Just fire the gun while you’re mid-air between jumps (or on a zipline). It may only be a couple short bursts of bullets, but those bursts will destroy anything they touch.
- [3] Improved Platform Stability – More accuracy to help hit weakpoints.
- [1] Oversized Drum / [2] High Velocity Rounds – Personal choice here. Both are great options, but we slightly prefer having more ammo due to the size of the swarms on higher difficulties.
- [3] Blowthrough Rounds – Lets us deal with crowds of enemies.
- [1] Variable Chamber Pressure – Whenever you can find a good chance to hunker down and just keep firing, you’ll quickly find your damage output skyrocketing.
- [2] Cold As the Grave – Great for when you’re dealing with swarms of enemies.
- Overclock: Lead Storm – The lynchpin of this build. Boosts your damage drastically in exchange for not being able to move while firing and a reduced stun chance/duration.
Build B: Burning Hell
A bit of an odd build for the minigun, as it turns you into a close-range burst damage Gunner who wants to overheat the Lead Storm. Thanks to the Burning Hell overclock, you want to practically be touching noses with the enemy, so you can light them on fire while shooting.
Yes, the overclock will cause you to overheat quickly, but that’s actually good this time around. Thanks to the Aggressive Venting mod, whenever you overheat you unleash an AoE blast of fire around you that does considerable damage and fears enemies. This is a fantastic way to get some breathing room on near-instant demand.
Unsurprisingly, a lot of enemies will be ignited with this build, so it’s best paired with the Bulldog using our Volatile Bullets build below. This will allow you to execute any bulkier enemies after they’re ignited. We suggest using the Incendiary Grenades in case they don’t fully ignite.
Also, since the Aggressive Venting blast will probably kill off all smaller enemies around you, it’s best to focus fire on a sturdier target. That way you’re not wasting any bullets on grunts that are about to vaporized.
- [2] Improved Motor – Faster firing for faster heating up.
- [1] Oversized Drum – Most of your damage comes from the overclock and Aggressive Venting, so it’s better to have more ammo.
- [2] Improved Stun — Combined with Aggressive Venting for even more crowd control.
- [2] Lighter Barrel Assembly – Helps you activate Burning Hell quicker.
- [1] Aggressive Venting — The reason this build works.
- Overclock: Burning Hell — Enemies within five meters of the front of your gun will basically combust as you fire. This is a massive damage increase, so take advantage of it whenever possible.
2. “Thunderhead” Heavy Autocannon
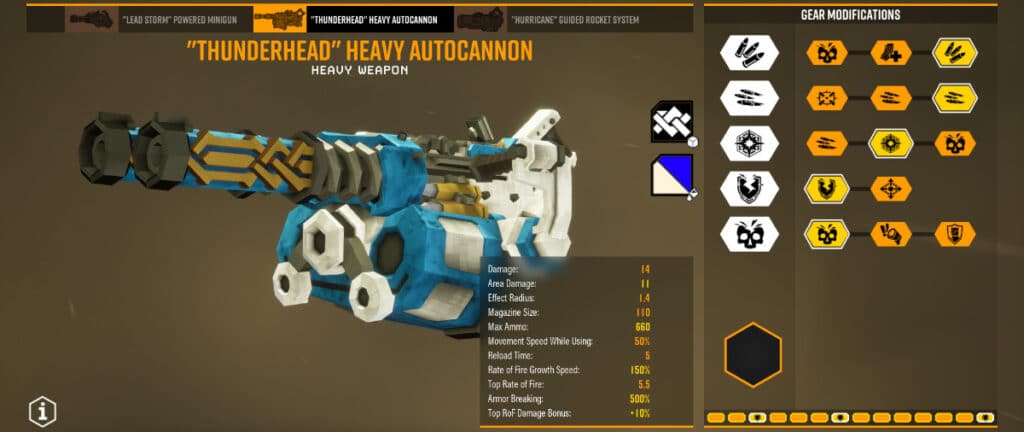
If there’s any gun in the game that’s all about AoE splash damage, it’s the Thunderhead. Loaded with explosive rounds, the Thunderhead deals direct damage before detonating and dealing AoE damage. As the splash radius on the explosion is quite large, it makes it well-suited for dealing with swarms of enemies. It’s also very good at destroying armor.
However, its accuracy is rather… lacking. Keep that in mind whenever you’re firing at something more than 15 meters away from you, as the shots tend to miss directly hitting your target.
Unlike the minigun, this weapon has no heating system and instead has a traditional magazine reload. However, it does have a similar ramp up in that the Thunderhead fires faster the longer the trigger is held. Given how large each magazine is, you’ll often be able to take advantage of its max firing rate.
In comparison to the Gunner’s other primary weapons, the Thunderhead is more of a specialized weapon depending on its build. You’ll want to build your secondary to compensate for whatever area you’re lacking in.

Build A: Carpet Bombing (Recommended)
This build doubles down on the AoE presence of the Thunderhead. You’re giving up even more direct damage, but gaining even more explosive splash damage and coverage. This build is absolutely fantastic for keeping swarms in check, but will struggle to deal with any individual tankier target.
Luckily, you can build your secondary to focus on dealing direct damage to isolated targets. We suggest pairing this with the BRT7 using the Lead Spray build below.
Additionally, thanks to Season 4’s buffs to the Carpet Bombing overclock, both the Loaded Rounds and Shrapnel Rounds mods now scale with the overclock instead of providing a flat bonus. In other words, the AoE splash hits harder and covers more ground than before.
- [3] Expanded Ammo Bags
- [3] Lighter Barrel Assembly – Synergizes with Feedback Loop.
- [2] Loaded Rounds
- [2] Shrapnel Rounds
- [1] Feedback Loop – Increases your splash damage.
- Overclock: Carpet Bomber – Sacrifice direct damage for more AoE damage and presence.
Build B: Combat Mobility
This build takes a more traditional direct damage approach. The Combat Mobility overclock turns the Thunderhead into the Gunner’s most mobile weapon, granting him near full movement speed while firing and tremendously boosting its fire rate. Just keep an eye on your ammo.
- [3] Expanded Ammo Bags – Constantly reloading is a bit of a pain, but running out of ammo is so much worse.
- [3] Lighter Barrel Assembly – Arguably overkill, but you’ll reach your top rate of fire almost instantly.
- [3] High Velocity Rounds
- [1] Hardened Rounds
- [1] Feedback Loop – You’ll reach your top rate of fire very quickly with this build.
- Overclock: Combat Mobility — The entire reason this build works. Boosts your movement speed, accuracy, and rate of fire. The reduced magazine size is annoying, but manageable.
3. “Hurricane” Guided Rocket System

The Hurricane is the last of the Gunner’s primary weapons and his most accurate weapon by far. That’s because the rockets fired from this weapon home in on whatever your reticle is targeting. You can keep the rockets up in the air for a while by simply aiming around before slamming them into any threat that pops up.
Despite having some splash damage on impact, this weapon is best suited for direct single-target damage. You have so much control over the rockets that you should be able to hit the enemy’s weakpoint with every shot (as long as you have line of sight).
It may take a bit of practice to get used to controlling the rockets (and not wasting them by accidentally ramming them into the environment), as the weapon takes depth perception into account. For example, shoot above an Oppressor’s head until the rocket travels behind it, before aiming at its face to 180° the rocket into the weakpoint on its backside.

Build A: Jet Fuel Homebrew (Recommended)
This build emphasizes exploiting enemy weakpoints with incredibly fast and precise rockets. While you won’t be dealing much AoE damage, most enemies should die very quickly with 1–2 shots to the face. Plus, thanks to the rocket’s fast travel speed, it’s fantastic at dealing with far-off enemies.
- [1] Missile Belts — Offsets the ammo reduction from the overclock.
- [1] Bigger Jet Engine — Faster rockets with more control.
- [1] Nano Missiles – Offsets the magazine size reduction from the overclock.
- [1] Shrapnel Load
- [2] Uncontrolled Decompression – Stunning your targets makes it even easier to hit their weakpoints.
- Overclock: Jet Fuel Homebrew — Drastically boosts the travel speed of your missiles and the damage dealt to weakpoints. Just make sure to aim carefully, or you’ll waste the advantages this overclock brings.
Build B: Salvo Module
This build is completely dependent on the overclock, letting you turn your missile launcher into a 3×3 shotgun. Holding down the trigger will cause you to start loading up to nine rockets that you can all fire at once. Even better, for each additional rocket loaded, you get a damage multiplier on all of the missiles!
As you can imagine, this is amazing at devastating whatever happens to have the misfortune of standing in front of you. Just make sure your side arm has plenty of ammo for dealing with more isolated critters.
As a side note, you can still fire individual missiles and guide them by rapidly pulling the trigger. You just won’t be able to hold down the trigger for a steady stream anymore.
- [1] Missile Belt — Ammo is critical for this build.
- [2] Anti-Tank Missiles
- [2] Improved Feed Mechanism – Speeds up the rate of loading the salvo.
- [2] Zip Fuel — You’re not going for precision with this build.
- [2] Uncontrolled Decompression – You’re pretty much guaranteed to stun anything that survives a decently loaded salvo.
- Overclock: Salvo Module — The lynchpin of this build.
Gunner Secondary & Builds
The Gunner has three options for his secondary. All three are powerful handguns that can deal devastating damage but require a few seconds to stabilize their accuracy between each shot. These are optimally used to finish off isolated enemies or for when lethal precision is required.
1. “Bulldog” Heavy Revolver

The Bulldog is the Gunner’s default secondary. As you would expect from a heavy revolver, it shoots hard but slow. A well-placed shot to a weakpoint will often one- or two-tap most enemies, thanks to its high innate weakpoint damage bonus.
While the first shot is always precise, you’ll need to let it stabilize before the next one if you want to be remotely accurate. Standing still will further increase its accuracy.
Build A: Volatile Bullets (Recommended)
This is a specialty build designed to deal massive damage to enemies that are on fire. It’s best used when you’re grouped with a Driller using the flamethrower and/or when you’re running the Lead Storm with a Burning Hell build.
Despite having limiting conditions, when they’re met, the sheer amount of damage you’ll deal to weakpoints will leave you staring in awe. Even a Detonator will die in just a handful of shots! We strongly recommend running Incendiary Grenades to help immediately ignite larger enemies.
- [2] Perfect Weight Balance – Accuracy is critical for hitting weakpoints.
- [1] Increased Caliber Rounds
- [3] Hollow-Point Bullets
- [2] High Velocity Rounds – While more ammo would be nice, this is an execution build.
- [2] Neurotoxin Coating – Chance at extra damage and further slowing your target.
- Overclock: Volatile Bullets – While it decreases the base damage of your bullets by a good chunk, the triple damage modifier against burning enemies more than makes up for it.
Build B: Chain Hit
This is a more general-purpose build that makes your revolver excellent at picking off isolated targets while having plenty of ammo.
- [2] Perfect Weight Balance
- [3] Expanded Ammo Bags
- [3] Hollow-Point Bullets
- [1] Expanded Ammo Bags
- [2] Neurotoxin Coating — 50% chance to poison your enemy. It may be the difference between you having to use a second bullet or not. You’re usually standing still to line up a shot anyway.
- Overclock: Chain Hit – A 75% chance to ricochet your bullets is pretty nice, especially since you’re using the Bulldog to clean up stragglers in this case. While the ricochet won’t guarantee a hit on a weakpoint, it can soften them up and help you save a bullet.
Build C: Magic Bullets
While the Bulldog is usually known for precision shots, this build goes in the complete opposite direction. In fact, you don’t even want to aim at enemies!
This build takes advantage of certain mods and the Magic Bullets overclock to turn the Bulldog into a AoE monster that provides crowd control via chaos theory. The overclock makes it so that whenever you shoot the terrain, your bullets will instead magically ricochet into a nearby enemy. This ricochet does not happen if you directly shoot an enemy, so it’s time to settle your grudge with the ground/wall/ceiling.
Thanks to the Explosive Rounds mod, each of your ricochet shots will deal AoE damage. Combine it with the Neurotoxin Coating mod, and now those exploding ricocheted bullets are spreading poison as well!
While it’ll take a couple shots and bit of time for the explosions/poison to kill your foes, this build is probably the most AoE oriented one out of all of the Gunner’s secondary weapons.
- [1] Quickfire Ejector
- [3] Expanded Ammo Bags
- [2] Explosive Rounds — Gives you AoE presence and can spread Neurotoxin Coating.
- [1] Expanded Ammo Bags
- [2] Neurotoxin Coating – Provides CC and extra damage.
- Overclock: Magic Bullets – The core of this build. While it decreases your damage, the splash damage from your Explosive Rounds and Neurotoxin Coating will more than make up for it. Plus, the extra ammo helps!
2. BRT7 Burst Fire Gun

The BRT7 is the second of the Gunner’s secondaries. As its name implies, this handgun fires in bursts of three shots every time you pull the trigger. While the shots all follow the same spread pattern per burst, the bursts themselves will start going in random directions if you rapidly fire.
Overall, the gun does less damage than the revolver but can be fired far more often. In terms of performance, this gun is far more suited for crowd control as opposed to damage and can let you deal with mobile enemies more easily.
Build A: Lead Spray (Recommended)
As the Gunner is usually most effective at mid-range, this build is designed for when an enemy gets too close for comfort. With zero regard to accuracy or bullet spread, you’re basically slamming this gun into your target’s face and pulling the trigger as fast as you can.
In the right conditions where you’re able to dump the entire clip into an enemy’s weakpoint, you’ll be outputting a ridiculous amount of damage.
- [1] High Velocity Rounds
- [3] Disabled Safety
- [2] Increased Caliber Rounds
- [3] Hollow-Point Bullets / [2] Expanded Ammo Bags — Personal choice of damage or ammo.
- [1] Burst Stun — Ensures you don’t take too much damage while in point-blank range.
- Overclock: Lead Spray — Destroys your accuracy, but that’s why you’re firing point blank. Compensates for the gun’s lower damage.
Build B: Micro Flechettes
This build turns the BRT7 into a miniature version of the Scout’s assault rifle. The Micro Flechettes overclock drastically boosts the accuracy and ammo capacity, at the cost of plummeting the weapon’s damage.
Luckily, by taking the damage mods and focusing on weakpoints, you’ll quickly find that the benefits of the overclock completely outweigh the initial drop in damage. The BRT7 becomes incredibly good at dealing with far-off targets and cleaning up individual enemies, so you can conserve your primary weapon’s ammo for when you really need it.
- [1] High Velocity Rounds
- [3] Disabled Safety – The overclock already takes care of your recoil, so it’s better to get more shots in.
- [2] Increased Caliber Rounds
- [3] Hollow-Point Bullets – Take advantage of the increased accuracy and aim for weakpoints.
- [2] Longer Burst – Makes it easier to kill enemies in a single burst.
- Overclock: Micro Flechettes – Effectively turns your burst pistol into a miniature assault rifle.
3. ArmsKore Coil Gun

Management decided that you were responsible enough to wield a railgun. Yes, a literal railgun. Condensed into a nice little sidearm, this weapon of pure devastation punches through enemies and terrain in a straight line, leaving a residual trail that damages enemies.
While it operates on a battery system, you still have to reload after each shot due to the nature of the weapon. Simply hold down the trigger to charge up the gun and release the shot when full. Holding the charge for too long will cause the shot to fizzle out.
As is the case with all of the Gunner’s secondaries, it’s rather sparse on ammo by default. At base, you have 16 fully charged shots. However, it’ll delete any none bulky enemy out of existence and has unerring accuracy. If you’re looking to constantly use your secondary in tandem with your primary, you might want to stick to the other secondary weapons.

The best care for the Coil Gun is when you can funnel enemies into coming at you in a straight line, before blasting through all of them with one shot. Ideally, any remaining foes will die from the residual trail.
That being said, despite being a railgun (and known for pure destruction), the best builds for the ArmsKore are more geared towards crowd control. Various mods and overclocks grant the residual trail left behind with each shot multiple properties that make them great for disabling the enemy.
Build A: Backfeeding Module (Recommended)
This build is for those times when you just need to make some breathing space and need to clear a line through the horde. Taking advantage of the mod that lets you fire a shot at any charge level (and spend less ammo), you’ll be able to blow through and scare away any enemies in the shot’s path on demand.
While a low-charge shot probably won’t kill everything in its path, you’ll be able to fire the weapon much more frequently than normal, especially with the bonus ammo from the overclock.
When combined with the mods that electrify and fear enemies, the Coil Gun becomes one of the best CC tools in the game. Fear only wears off once enemies travel a certain distance, so slowing them with electric effectively makes the fear last longer.
- [2] Larger Battery
- [2] Controlled Magnetic Flow – Lets you fire a partially charged shot for less ammo and damage.
- [2] Fear Trajectory – The lynchpin that gives the weapon crowd control.
- [2] Shockwave – The damage from the shockwave is unaffected by charge level, so firing off multiple low-charge shots can churn out quite a bit of damage.
- [3] Electric Trail – Makes your fear last longer and damages enemies.
- Overclock: Backfeeding Module – Gain a lot more ammo at the cost of a sizable damage nerf.
Build B: Hellfire
Previously, this was best build for the ArmsKore Coil Gun, as you could spam low-charge shots to light everything on fire and blow them up. However, a nerf to the Hellfire overclock made it so that it only works on fully charged shots now.
Luckily, this is still a strong build that does good damage and has excellent synergy with the Lead Storm’s Burning Hell build.
Thanks to the Hellfire overclock, fully charged shots will leave a trail of fire across the entire terrain, quickly igniting anything in its path. This works nicely in tandem with the Necro-Thermal Catalyst mod that causes ignited enemies to explode when killed by the direct damage of the Coil Gun.
You can either use two fully charged shots to ignite and detonate enemies, or if you’re running the Lead Storm with Burning Hell, burn enemies with that before finishing them off with a Coil Gun shot.
- [2] Larger Battery – Needed to offset the overclock’s ammo reduction.
- [3] Improved Feeding System
- [1] Concussive Shockwave – It’s better to stun enemies in the flames instead of fearing them out of the fire.
- [1] Shockwave – A bit of extra damage
- [1] Necro-Thermal Catalyst – The overclock will ignite most enemies before killing them, so they’ll turn into dying bombs.
- Overclock: Hellfire – The core of this build
Gunner Equipment & Builds
With the Gunner’s main arsenal out of the way, let’s take an in-depth look at the rest of his equipment and how to build them.
Zipline Launcher

Sometimes, the environment itself is sometimes the biggest threat. Sheer cliffsides and inhospitable terrain are common problems. Thankfully, you have your Zipline Launcher.
Whenever you need to traverse an area where setting up a tunnel or platforms would be impractical, toss out a zipline for your team. This is especially useful for when you need to actively head back and forth between two areas. The ziplines are also indestructible.
You can also carry heavy objects and use the zipline at the same time (amazing for retrieving Aquarqs on Point Extraction missions). If you’re going down on a zipline, you can drastically accelerate by holding down the forward button. No such luck for heading up, though — you’ll have to wait that one out.

You can also shoot while riding a zipline, making it a great way to deal with melee enemies by staying out of harm’s reach or if you’re running the immobile Lead Storm Lead Storm build from above.
Just be warned that taking too much damage will cause you to fall off the zipline. If you use this strategy, try to position yourself not too high up and always take out ranged/flying enemies first. Especially since they’re programmed to prioritize targeting players on ziplines.
Additionally, you can use ziplines to break a fall by attaching to one mid-descent. Just make sure to mash that interact button as you’re falling. To that end, you can also set up a zipline jungle when you know you’re going to be doing a lot of fighting in one area (such as when you’re dealing with a Dreadnought) and jump from one to another to avoid incoming attacks.
Build: Ain’t No Mountain High Enough
Designed to set up ziplines at steeper angles and to move along them faster.
- [2] Upgraded Connection Joint
- [1] Reinforced Cable
- [2] Increased Motor Traction — If you’re falling off, you’re doing something wrong.
Shield Generator

The Shield Generator is arguably the best part of the Gunner’s kit, providing a dome of near perfect protection for a few precious seconds. Simply toss it out, and it’ll deploy as soon as it touches a surface, pushing away most enemies within its radius.
During those six seconds of protection, any dwarf inside the bubble will take 50% less damage and have their shield immediately start recharging. More importantly, nearly every enemy and attack is unable to enter the barrier.
However, there are a few exceptions to the shield’s defense:
- Praetorian’s acid spray
- Oppressors’ quake attack
- Detonator’s stomp attack
- Roller’s rolling strike
- Parasites (only appear during certain mission modifiers)
- Terrain damage (like standing on molten ground)
Beyond that handful of attacks, your team is effectively invincible inside the bubble and can use the time to regroup. Do note that there is a 12.5 second recharge time before you can deploy another shield.

The shield’s most common use is to be deployed to safely revive a downed teammate. However, you should get in the habit of deploying the shield when you see a massive attack coming to avoid being downed in the first place.
Build A: 9 Seconds is All We Need
Designed to keep your shield up as long as possible. Use that time to revive, shield up, and kill everything around you before it dissipates.
- [2] Improved Projector — Needs to be large enough for your entire team.
- [2] Larger Capacitors
- [3] Improved Efficiency
Gunner Grenades
As is fitting for the Gunner, all of his grenades are straight out of a traditional FPS game – yes, we know Deep Rock Galactic is also an FPS.
1. Sticky Grenade

The Sticky Grenade is the default grenade for the Gunner. This baby will stick to any surface or enemy it comes in contact with. If stuck to an enemy, there’s a chance they’ll run away in fear, before the resulting explosion causes nearby enemies to also flee in terror (assuming they’re still alive).
With six of these to your name, you can use them to great effect to disperse a crowd and get some breathing room. The fuse on it will start counting down as soon as it sticks to something, so watch out!
2. Incendiary Grenade

If you’re interested in turning an area into an inhospitable flame pit, the Incendiary Grenade is the grenade for you. The area it lands will be carpeted in flames, any enemy hit by the initial explosion will immediately burst into flames.
Interestingly, it will not detonate when bouncing off walls and other surfaces. Only once it hits the floor will it combust, so plan ahead where you want to toss this since you only have four of them. We strongly recommend using these in tandem with the Bulldog’s Volatile Bullets build to set up enemies for immediate execution.
3. Cluster Grenade

The Cluster Grenade is arguably the strongest grenade for the Gunner due to the sheer area coverage and destruction it causes. Upon landing, the grenade will launch out another nine mini-clusters in random directions and immediately explode.
Combined, these nine clusters do tremendous damage and can stun enemies as well. With four of these at hand, you can clear out massive groups of enemies at will. Watch out for your allies, though!
4. Tactical Leadburster
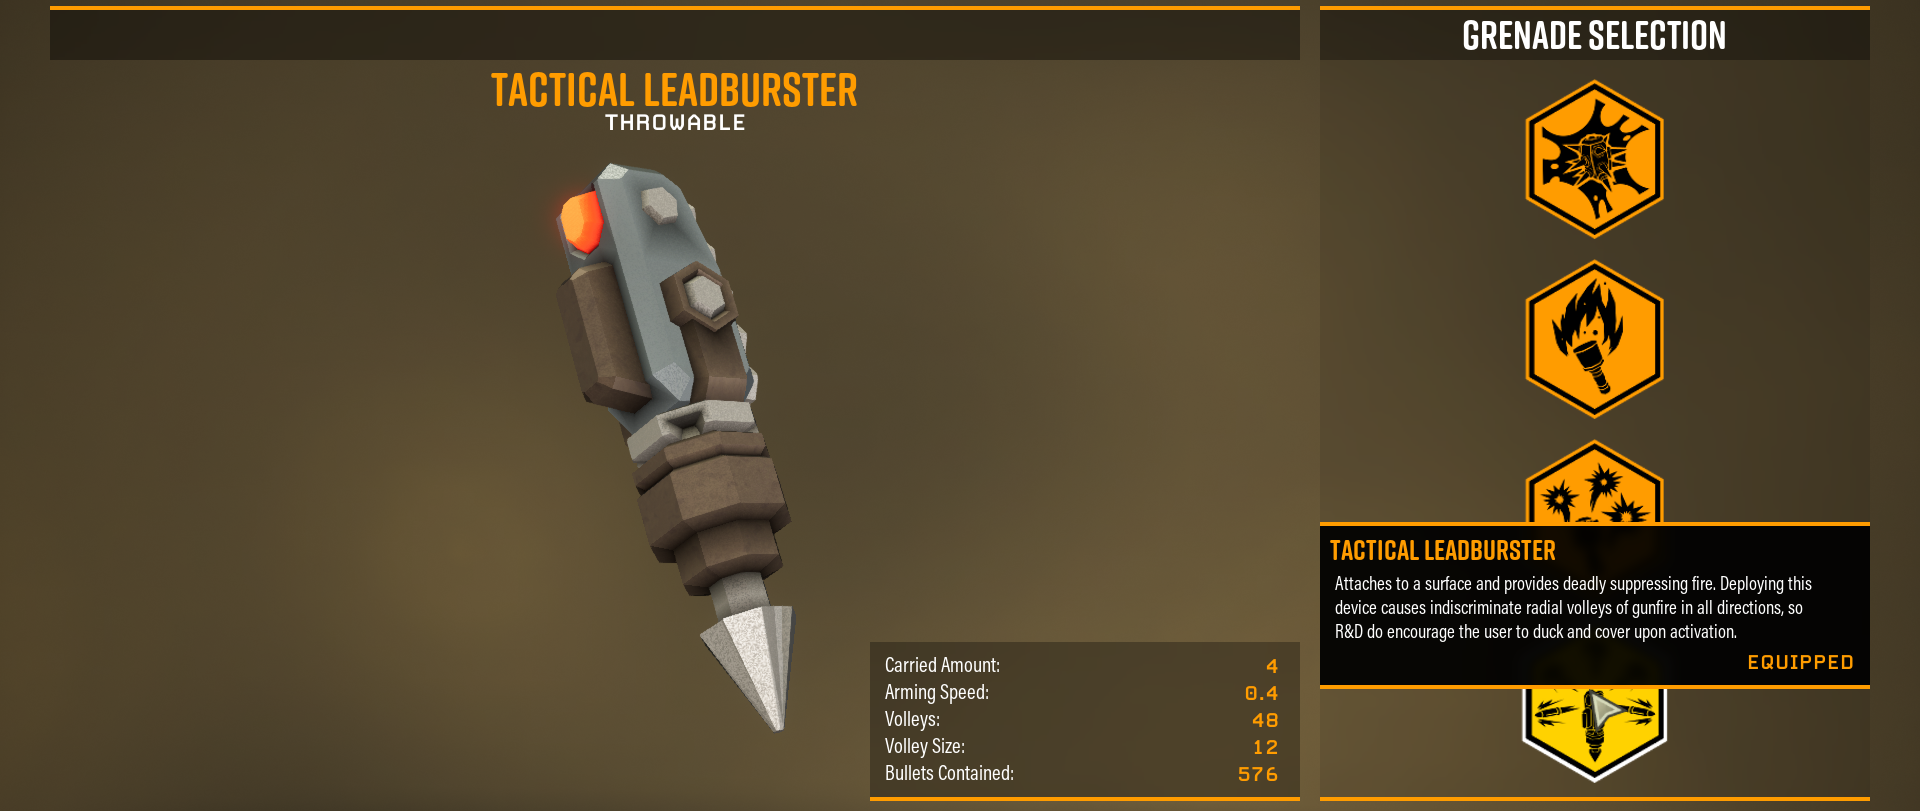
The latest grenade to be added to the Gunner’s arsenal as of Season 3. Tossing one of these will cause it to implant itself where it lands and immediately start spraying a ridiculous amount of bullets in a small sphere. Notably, all of the bullets are released in the span of about one second.
The damage output is incredibly high and basically instantaneous, but it’s completely limited to its rather short range. However, anything within that range is torn to shreds.
It’s best used against large immobile targets, like a Bulk Detonator, and thrown directly beneath them. We suggest laughing maniacally as their health bars disappear. Unfortunately, you can only carry a max of four Leadbursters at a time, so make sure to use them only when you really need something to die immediately.
Join the High Ground
And that’s it for our Deep Rock Galactic guide on the Gunner — thanks for reading! While we’ve updated this Gunner guide for Season 4, if there’s anything else you feel that we should mention or a build worth looking into, let us know in the comments below!
As always, make sure to subscribe to the High Ground to stay up to date with the latest news on Hoxxes IV and all things gaming related!
Happy mining out there! May your beards be splendid and your beer mugs always full!
Deep Rock Galactic Navigation
- How to Use and Build the Shard Diffractor in Deep Rock Galactic
- How to Use and Build the Breach Cutter in Deep Rock Galactic
- How to Beat The Nemesis in Deep Rock Galactic
- How to Survive Haunted Caves in Deep Rock Galactic
- Deep Rock Galactic Achievement Guide & Trophies
- How to Promote in Deep Rock Galactic
- Deep Rock Galactic – Master Guide Hub
- Top 10 Tips for Deep Rock Survivor
- Every Biome in Deep Rock Galactic, Ranked
- Top 15 Deep Rock Galactic Tips for Beginners
- Deep Rock Galactic: The Ultimate Beginner’s Guide
- Deep Rock Galactic: Best Co-Op Class and Best Solo Class (+Every Classes’ Strengths Explained)
- Best Perks in Deep Rock Galactic, Ranked
- Guide to the Forge & Forge Mastery in Deep Rock Galactic
- Deep Rock Galactic: The Assignment Board, Explained
- What Does Gold Do in Deep Rock Galactic, Explained
- How to Get the Tritilyte Key in Deep Rock Galactic
- Top 10 Games Like Deep Rock Galactic
- Deep Rock Galactic: All Big Season 3 Changes Explained
- Deep Rock Galactic KPI Terminal: Everything You Need to Know
- Every Beer in Deep Rock Galactic Explained
- Deep Rock Galactic: Season 2 Overview
- Deep Rock Galactic: New Weapons in Season 2 Explained


You must sign in to comment.
Don't have an account? Sign up here!