
Image: Capcom via HGG
Having spent all her life in the rainy PNW, Ashley knows the value of spending time inside with a good game. She developed a passion for the unique... Read more
Reviewed by Benjamin Barr
Capturing monsters has been a staple of the Monster Hunter series since the very beginning. Trapping and capping your target is a great way to pick up rare rewards and end a hunt a little early. There’s nothing quite like the breath of relief that comes from tranquilizing a tough monster after a long fight when you’re on your very last faint and out of healing items.
If you’re having a tough time bringing your monsters down humanely, we’re here to help! We’ve put together a complete guide on how to capture monsters in Monster Hunter Rise, including a detailed tutorial and a handful of tips and tricks to make capping a little easier on you.
Let’s get started!


Monster Hunter Rise: How To Capture Monsters Guide
We’ll begin with a basic tutorial on how to capture monsters in Monster Hunter Rise. This part of the guide covers the necessary parts of the process — everything you’ll need to get the job done from start to finish.
1. Choose the Right Quests
First things first, be sure you’re heading out on a quest where it’s actually possible to capture your target monster. This won’t be too difficult — since most quests simply require you to “hunt” a given monster, you typically have the choice to either capture the monster or kill it outright, depending on the drops and quest rewards you’re aiming for.

There are also quests that specifically ask you to capture your target monster, so these are a safe bet if you’re hunting a particular monster. These quests are marked at the Quest Counter by a small grey icon of a sleeping monster. The only quests where capping the monster results in a fail state are the ones that ask you to “slay” your target, in which you’re expected to actually kill the pesky thing.
2. Watch for Capture Signals
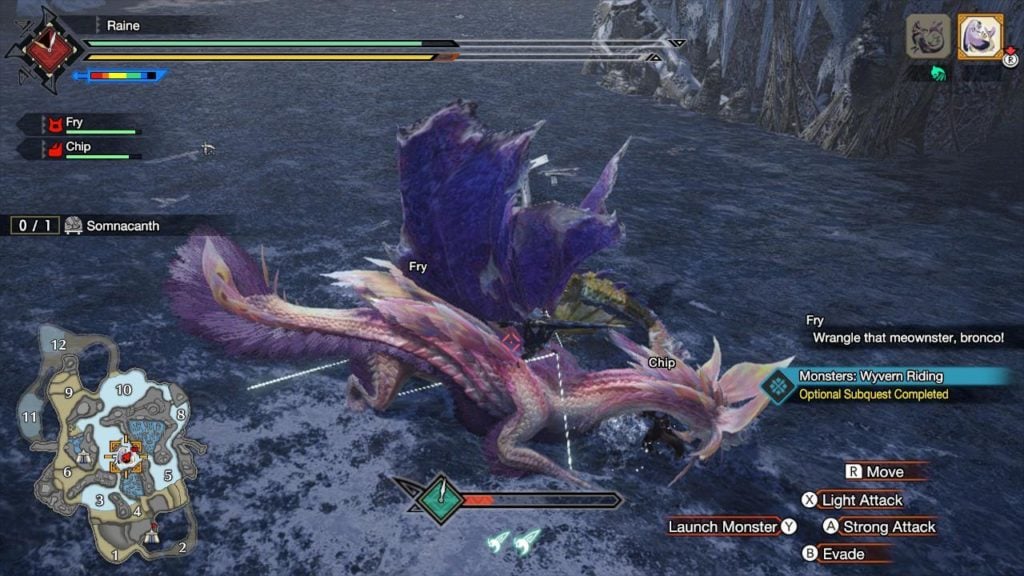
When the monster is weak enough to capture, you’ll get a few different signs to let you know it’s time to bust out the traps. If you’re playing solo, your Palico will give you the heads up by saying that your “purr-ey” is weak and ready for capture. In both solo and multiplayer, you’ll also see a blue marker appear on the monster’s icon (shown in the upper-right corner of your screen) notifying you to rein in your attacks and start preparing to cap.

You can also keep an eye out for the monster’s limp. In most cases, a monster will begin limping and try to leave the area when they’re weak enough to be captured. Don’t get this confused with their exhausted state — while monsters will often stop to take a quick breather when they become tired, they’re only ready for capture when they start limping around the map.
3. Set A Trap and Grab Your Tranqs
When you’re ready to capture your monster, set down your trap and wait for them to stumble into it. You might have to lure them in — some monsters just refuse to be helpful with their positioning, and others are prone to destroying traps on sight. If your monster is asleep, you can simply place the trap at their feet and wake them with an attack, as the trap will trigger as soon as they stand up.

Once your target is caught in the trap, drop a couple of Tranq Bombs near their head and reap your rewards!
Capping Tips and Tricks
Now that we’ve learned the basics of how to capture monsters in MHR, let’s jump into a few handy tricks. These techniques will make capping a little easier, helping you avoid drawn-out fights and any unwelcome surprises on the field.
1. Fight the Monster Like Normal
If you’re new to the Monster Hunter series, fear not — there’s not really a secret technique to capturing monsters. Aside from slapping down a trap and some tranq bombs once your quarry is worn down, you can treat a capture quest the same way you would a regular hunt.
This means you can completely open fire. Exploit the monster’s weak points, break off valuable parts, slam them into walls like it’s amateur hour at the rodeo. As long as you stop the pain train when the monster’s ready for capture, just go ham!
2. Solo and Group Hunts Have Different Capture Thresholds
Some monsters take a lot longer to wear down, especially if you’re hunting in multiplayer mode. Monsters you pick up from Gathering Hub quests are subject to difficulty scaling, meaning that hunts get more difficult as more players are added.
If you go on a hunt by yourself (regardless of whether it’s a Village or Hub quest), the monster will take less time to capture because their difficulty rating is adjusted for a single player. If someone joins your quest from the Gathering Hub, the difficulty increases to account for more players.
Since the difficulty scale involves raising the monster’s maximum health, it’ll take a bit longer to weaken your target to the capping point. The exact time difference will depend heavily on your squad, of course — more effective teamwork and higher DPS weapons will make the hunt go much faster — but you can generally expect the fights to be harder and a little more time-consuming before you can pull out your traps.
3. Traps Can Lose Their Effectiveness
Though the process of capturing a monster is pretty straightforward, you still need to be judicious with your use of traps. If you use the same kind of trap too many times during a single hunt, your target monster will eventually become resistant to it and you may not be able to keep them trapped long enough to tranq them.
If you’ve used a few shock traps during your hunt and they don’t seem to be doing their job, try heading back to camp and picking up a pitfall trap to make sure your monster doesn’t build up a resistance.
It’s also worth keeping in mind that some traps work better in certain scenarios. Shock traps, for example, generally work better when the monster is enraged, while pitfall traps are more effective when the monster is fatigued. There are a few exceptions to this rule, so check your Hunter’s Notes to see what’s most effective for your target monster!
4. Keep Immunities in Mind
Some monsters are resistant or otherwise immune to certain kinds of traps. This is a pretty common theme in Monster Hunter, though not all games handle it the same way. Check your Hunter’s Notes to review all known info about a given monster to plan for an effective hunt.

You can access this info easily by selecting “Hunter’s Notes > Large Monsters > Physiology > Hunting,” but here’s a quick breakdown of all the monster trap immunities and resistances in Monster Hunter Rise:
| Monster | Resistance(s) | Capture Tips |
|---|---|---|
| Nargacuga | Pitfall traps | Nargacuga can destroy pitfall traps, and the game instructs you to “be discreet” when placing them. Try using a shock trap instead, or wait to place your pitfall trap until the monster is enraged and will have a harder time noticing it. |
| Zinogre | Shock traps | Zinogre is immune to shock traps when Supercharged, and there’s a chance that stepping on the trap will charge them up anyway. It’s better to rely on pitfall traps for this one. |
| Rajang | Pitfall + Shock traps | Rajang can avoid pitfall traps when it’s not powered up, and will destroy shock traps when its arms are charged. Your best bet is to cut off the tail to stop it from powering up, then use a shock trap when you’re ready to capture. |
As always, all Elder Dragons are immune to traps. Capping isn’t an option, so save your inventory space and leave the traps and tranqs behind for these hunts.
5. Farm Capture Supplies
If you capture monsters frequently, you’ll need a steady stream of supplies to keep your inventory stocked. You can always buy materials from the Market or by trading with Rondine, but you can often save money and get better returns with Buddy Bargaining.

Note that you’ll still have to buy Trap Tools, but you can farm any of the following items by using your submarines:
- Thunderbug (needed for Shock Traps)
- Ivy (needed to make Nets for Pitfall Traps)
- Spider Web (needed to make Nets for Pitfall Traps)
- Sleep Herb (needed to make Tranq Bombs)
- Parashroom (needed to make Tranq Bombs)
Since you can only farm for three items at a time, you’ll need to mix and match depending on the items you need most. Think about which materials are easiest to pick up in the field, and consider farming for things that are harder to gather on your own.

Become a High Grounder
That’s it for our Monster Hunter Rise How To Capture Monsters Guide — thanks for reading! If you have any other helpful suggestions to offer, feel free to help out your fellow hunters and drop them in the comments. Don’t forget to subscribe to our newsletter and follow us on social for more Monster Hunter guides like this.
Happy hunting!


Monster Hunter Rise Navigation
- MHR: Sunbreak Best Switch Axe Build Guide
- MHR: Sunbreak Best Charge Blade Build Guide
- Monster Hunter Rise | Best Dual Blades Build Guide
- Monster Hunter Rise | Best Bow Build Guide
- Monster Hunter Rise: Best Hammer Build Guide
- Monster Hunter Rise: Best Great Sword Build Guide
- Monster Hunter Rise: Best Sword and Shield Build Guide
- MHR: Best Dual Blades Switch Skills Guide
- Monster Hunter Rise: Best Lance Switch Skills
- Monster Hunter Rise: Sunbreak Zenny Farm Guide
- 5 Best Mods for Monster Hunter Rise: Sunbreak
- Monster Hunter Rise: A Complete Rampage Quest Guide
- MHR | Elemental Blights and Abnormal Status Effects Guide
- Monster Hunter Rise: Complete Buddy Bargaining Guide
- Monster Hunter Rise: Complete Argosy Guide
- Monster Hunter Rise: Complete Talisman Melding Guide
- Monster Hunter Rise: Wyvern Riding Guide
- Monster Hunter Rise: How to Find and Unlock All Sub-Camps
- Monster Hunter Rise: How To Capture Monsters (And Why)
- Monster Hunter Rise: The Best Bunny Dango Combinations
- The Ultimate Monster Hunter Rise Palico Guide (Top Builds)
- The Ultimate Monster Hunter Rise Palamute Guide (Builds and Gear)
- MHW: Iceborne Best Lance Build Guide
- MHW: Iceborne Best Hammer Build Guide
- MHW: Iceborne Best Light Bowgun Build Guide
- MHW: Iceborne Best Sword and Shield Build Guide
- MHW: Iceborne Best Hunting Horn Build Guide
- MHW: Iceborne Best Gunlance Build Guide
- MHW: Iceborne Best Greatsword Build Guide
- MHW: Iceborne Best Heavy Bowgun Build Guide
- MHW: Iceborne Best Bow Build Guide
- MHW: Iceborne Best Insect Glaive Build Guide
- MHW: Iceborne Best Charge Blade Build Guide
- MHW: Iceborne Best Longsword Build Guide
- MHW: Iceborne Best Dual Blades Build Guide
- MHW: Iceborne Best Switch Axe Build Guide


You must sign in to comment.
Don't have an account? Sign up here!