
Image: ArenaNet via HGG/Tyler Locke
Tyler is a psych graduate turned freelance writer and one of the newest additions to the HGG team. They currently write guides for a variety of gam... Read more
Reviewed by Benjamin Barr
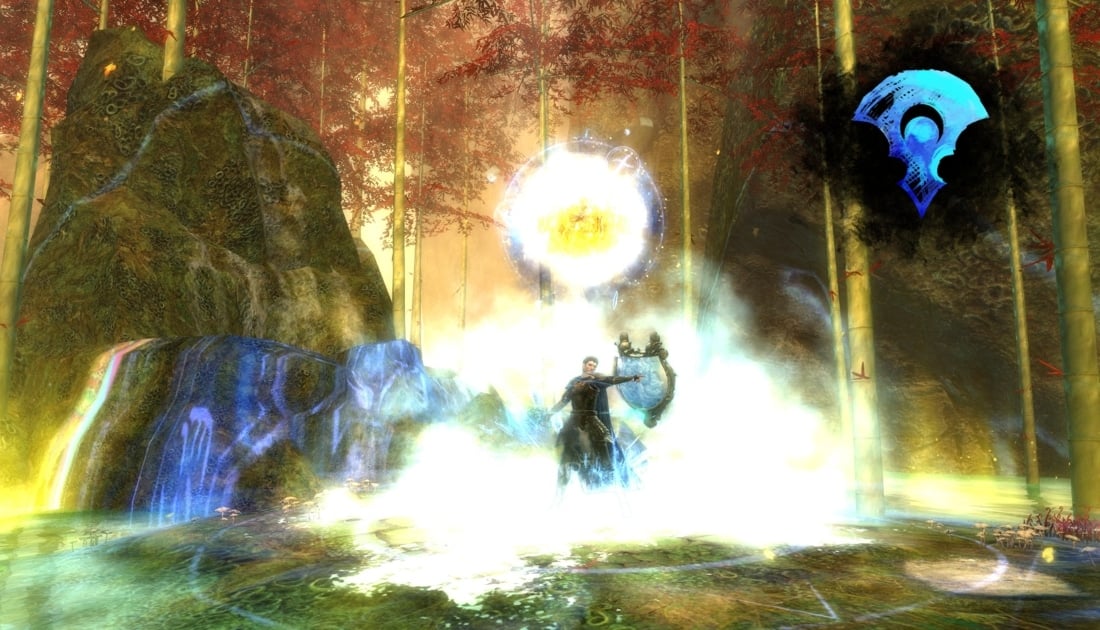
What do you think of when you hear, “DPS class”? Some may think of the classic Warrior from World of Warcraft, the Red Mage from Final Fantasy, or the Jedi Sentinel from Star Wars. Like those MMOs, being the best DPS class (or at least one of them) in Guild Wars 2 requires more than just dealing huge amounts of damage. In addition to high damage, some of the best can provide great crowd control, buffs, group stealth, and even be emergency supports. With that in mind, we’ll be going over the best DPS class & build options to choose in GW2.


Difference Between Power and Condi Builds
Typically, in Guild Wars 2 there are two types of DPS builds, Power and Condi. The difference between Power and Condi is the type of damage they do. Power builds primarily deal strike damage which is the basic damage most attacks do. The more Power you have, the more damage these attacks will do. Most Power builds have high burst damage and excel against bosses with multiple phases.
Condi, on the other hand, stands for condition which is the damage they focus on. Conditions include Poison, Bleed, and others. Condi builds gear as much Condition Damage and Expertise as possible so their conditions last long and deal plenty of damage. Condi builds take time to stack conditions and prefer bosses that stay still and have few phases, so the conditions don’t expire.
As you play more, you’ll understand when to use a Condi build and when to use a Power build. But enough of the build lessons, lets get into the best DPS class builds in GW2.
Best Power DPS Class Builds in GW2
Power Catalyst (Elementalist)

Catalyst is the Elementalist’s third elite specialization from the End of Dragons expansion. With Catalyst, the Elementalist gains access to the Hammer and a Jade Sphere used to summon spirits that empower them and their allies.
We covered Power Quickness Catalyst back in our Best Support Classes. That build focused on activating Jade Sphere to mainly grant allies the Quickness boon. However, if you focus on pure damage, Catalyst can reach about 42k DPS making it one of the best DPS class builds in GW2.
What separates Power Catalyst from other DPS classes are the multiple self-buffs in their arsenal. Their Jade Sphere along with the Hammer have skills that empower their damage and deal continuous damage. In the meantime, Catalysts can still attack helping them hit that benchmark of 42k damage.
However, as with all Elemental builds, Catalyst has a lengthy rotation and its a must to properly maintain those self-buffs. To see how it all comes together, lets start with what stats you need.
Stats
To hit that 42k benchmark, we’re going to need as much Power, Ferocity and Precision as we can get. The best gear prefixes we have are:
- Berserker’s – Power, Precision, Ferocity
- Marauder’s – Power, Precision, Vitality, Ferocity
Berserker’s gear will have the most damage stats so we can deal as much damage as possible. Luckily you can buy a full Exotic set of Berserker’s gear on the trade market for less than 4 gold. You could also go Marauder’s for survivability at the cost of damage. However, you should have plenty of damage reduction through your skills alone.
Specializations

For specializations we will need Fire, Air, and Catalyst.
The Fire spec will increase our damage while attuned to fire. The must have traits are Power Overwhelming and Persisting Flames. The first is just a straight 150 Power increase for having 10 stacks of Might. The second is a 10% damage increase for having a fire field hit an enemy.
The Air spec will increase our damage no matter what element we are attuned to. Ferocious Winds and Bolt to the Heart are the two must have traits. Ferocious Winds will increase our crit damage by a percentage of our crit chance. At the same time, Bolt to the Heart gives a 20% damage bonus to enemies below 50%.
Lastly, the Catalyst spec will give us various damage buffs for meeting specific requirements. For example, Vicious Empowerment gives +2% to all stats every time we disable or immobilize an enemy. Similarly, Empowering Auras gives a maximum of 15% damage increase every time we gain an aura through element attunement. Finally, Empowered Empowerment doubles these bonuses.
Weapons and Skills

Our weapon of choice will be the Hammer and only the Hammer. As with any Elementalist weapon, each element has its own weapon skills for you to learn. Luckily, the circular projectile skill is the same for each attunement. Weapon skill 3 will summon the projectile in each element.
Each skill provides the damaging projectile and a buff depending on the element you are using. For example, Fire attunement has Flame Wheel which gives 10% damage while it’s active. Each skill lasts for 15 seconds so your job is to rotate through each element keeping this skill active while using other skills.
As for your utility skills, the must haves are Relentless Fire (7), Shattering Ice (8), and Glyph of Storms (9). Relentless Fire is a 10% damage buff but should be using in Fire attunement for increased duration. Likewise Shattering Ice gives AOE to attacks and should be used in Water.
Rotation
Despite having to learn 4 elements each with different skills, the Catalyst’s rotation isn’t very strict and mainly prioritizes skills to use. Always use Fire and Air first, then Water and Earth.
Fire
Air
- Jade Sphere (F5)
- Surging Flames (2)
- Flame Wheel (3)
- Triple Sear (4)
- Molten End (5)
- Relentless Fire (7)
- Jade Sphere (F5)
- Hurricane of Pain (2)
- Crescent Wind (3)
- Shock Blast (5)
Water
Earth
- Jade Sphere (F5)
- Rain of Blows (2)
- Icy Coil (3)
- Crashing Font (4)
- Shattering Ice (8)
- Jade Sphere (F5)
- Whirling Stones (2)
- Stonestrike (1)
- Rocky Loop (3)
- Ground Pound (5)
Always use your Jade Sphere for each element as it grants boons to yourself and allies while also dealing damage. Your entire goal should be to use all the skills in each element then immediately switch to the next. Don’t forget about Glyph of Storms and throw it wherever in your rotation.
Master the Catalyst and you’ll blow through any content on one of the highest DPS classes in GW2. Click here for a build editor to see the Catalyst build in depth.
Power Soulbeast (Ranger)

Soulbeast is the Path of Fire elite specialization for the Ranger. As a Soulbeast, the Ranger has learned how to use the Dagger and how to fuse with their pet. With this new power, the Ranger gains bonus stats and new abilities depending on what type of pet they fuse with.
While it doesn’t do insane amounts of damage, Soulbeast is one of those DPS classes that the GW2 community loves to see. It’s not overly complicated, deals consistent damage, and brings plenty of utility to any fight.
Soulbeast also has multiple builds so it’s the perfect class for any situation. Whether you’re a fan of Power builds, Condi builds, or want to try a Hybrid version, there’s a build for you. The best part is they relatively deal the same amount of damage.
To keep it simple, we will just cover the Power Soulbeast.
Stats
As with all Power builds, we need as much Power, Precision, and Ferocity as possible. So, our best gear prefixes are:
- Berserker’s – Power, Precision, Ferocity
- Marauder’s – Power, Precision, Vitality, Ferocity
Berserker’s is the best choice here and the easiest to get. It gives us the most damage stats and you can grab a full set on the trade market for less than 4 gold.
Marauder’s is a good choice as well if you find yourself taking a lot of damage and need the extra health. Just know you’ll suffer a bit of damage loss. If you really want, you could replace some of the Berserker’s gear with a few pieces of Marauder’s.
Specializations

For Power Soulbeast, we will take Skirmishing, Beastmastery, and Soulbeast.
Skirmishing will give us some Fury and Quickness just for switching weapons. What we really want is Hunter’s Tactics and Vicious Quarry. These will give us bonus damage, crit chance and crit damage.
In Beastmastery, Pack Alpha and Pet’s Prowess increases our pets stats which affect us when we merge with our pet. Additionally, Two-Handed Training and Honed Axe will increase our weapon damage with Greatswords and Axes, the two weapons we will be using.
Lastly in Soulbeast, we have Live Fast that gives Fury and Quickness when we use Beast skills. Then every time we gain Fury we get 15% extra damage with Furious Strength. We also have Twice as Vicious which increases our damage whenever we interrupt an enemy.
Weapons and Skills

This time around Power Soulbeast needs two sets of weapons, the Greatsword and the Axe/Axe. We will switch between these two weapons, using their highest damage skills off cooldown.
For the Greatsword, Maul (2) will be our best skill to use. Maul does tons of damage, applies Vulnerability, and gives the next attack 25% increased damage. Greatsword also has Hilt Bash (5) which stuns targets. More importantly, it triggers Twice as Vicious giving a 10% damage increase.
Axe/Axe will deal most of the damage. The Axe’s auto-attack grants Might per hit and bounces between enemies for decent group clear. The highest damage skill the Axes have is Whirling Defense (5) which is a channeled multi-hit skill that deals tons of damage. Like the Greatsword, Axe also has Path of Scars (4) which triggers Twice as Vicious by pulling enemies.
As for our utility skills, we need Sic Em (8) and One Wolf Pack (0) to increase our damage whenever possible. Likewise, Signet of the Wild (7) passively increases our crit damage. Everything else is up to you.
Pets

Since we will be merging with our pets, we will need specific ones to get the right stat bonuses. So, we will take the Red Moa and the Rock Gazelle. Mainly, we will be using the Red Moa to merge with. It will give us 150 Power and 100 Ferocity. More importantly, it will give us Worldly Impact (F3) which is a high damage skill to be used off cooldown.
The Rock Gazelle gives us the same but we should only use it whenever our team need additional crowd control to break defiance bars. If you don’t where to find these pets, check out our Best Ranger Pets Guide to make some new furry friends.
Rotation
Power Soulbeast’s rotation deals with switching between Greatsword and Axes and using high damage skills off cooldown. Be sure to use Beast Mode to merge with your pet before starting the rotation.
Greatsword Start
Axe Rotation
- Maul (2)
- Sic Em (8)
- Hilt Bash (5)
- Maul (2)
- Worldly Impact (F3)
- Frost Trap (9)
- One Wolf Pack (0)
- Frenzied Attack (F2)
- Maul (2)
- Weapon Swap
- Winter’s Bite (3)
- Splitblade (2)
- Path of Scars (4)
- Whirling Defense (5)
- Splitblade (2)
- Repeat Steps 1-3 x2
- Weapon Swap
During the Axe Rotation, you’ll have to auto-attack while you wait for skills to come off cooldown. Additionally, be sure to activate Sic Em before Maul, Whirling Defense, or Worldly Impact for more damage. Lastly, don’t forget about your Rock Gazelle for more crowd control.
Here is the build editor for Power Soulbeast that you can play with to your hearts content. For our last Power build, we will look at Bladesworn.
Power Bladesworn (Warrior)

As of the recent patches, Warriors are eating good. While Berserker is in the dumps, Spellbreaker and Bladesworn are very meta and can reach around 40k DPS each. Some may argue that Spellbreaker is the better of the two but Bladesworn has its benefits and its one of the coolest DPS classes in GW2.
Bladesworn is the third Warrior elite spec from End of Dragons. They pick up the Gunsaber, a sword and gun combined, to channel their flow and unleash the Dragon Slash. Played right a single Dragon Slash can deal around 200k damage in one attack.
Besides the amazing Dragon Slash, Bladesworn brings plenty of crowd control to a party without having to interrupt their damage rotation. Likewise, they innately generate Might and Quickness for their team without a DPS loss.
Let’s see how they achieve all of this.
Stats
Just like our other Power builds, we need plenty of Power. Normally, I would suggest multiple options but for Bladesworn we need Berserker’s gear. Skimping out on Precision and Ferocity will make our Dragon Slashes hit like wet noodles. Getting the highest crit chance possible is an absolute must.
For an additional 20% crit chance bonus install a Superior Rune of the Thief on your armor as well.
Specializations

For Power Bladesworn we need the Strength, Tactics and finally the Bladesworn specs.
Many of the traits in Strength are small damage buffs, 5% damage here and +10 Power there. What we really want is Berserker’s Power. With this equipped we will gain 15% bonus damage on Burst skills and it just so happens that’s exactly what Dragon Slash is.
Tactics on the other hand is mainly used to give ourselves and allies Might and Quickness. With Marching Orders and Martial Cadence every Burst skill we use will send out those boons.
Lastly, Bladesworn is where a lot of our damage and utility comes from. Fierce as Fire increases our damage per round of Ammunition we use. Ammunition is the resource Dragon Slash and other skills use. Additionally, Unyielding Dragon makes Dragon Slash unblockable and a 1 second stun.
Weapons and Skills

Our weapons of choice are the Axe/Pistol combo. While we’ll use Dragon Trigger and Gunsaber most of the time, its important to know what the Pistol skills do. Gunstinger (4) applies Vulnerability but also reloads Dragon’s Roar. Dragon’s Roar (5) uses all your pistol ammo to deal damage per bullet. Use these together to deal quick burst damage.
Besides your healing skill, all utility skills are set in stone. Flow Stabilizer (7) is there to make sure we have enough flow for Dragon Slash. Overcharged Cartridges (8) buff our damage. Dragonspike Mine recharges Dragon Trigger while Tactical Reload (0) refreshes all of our Bladesworn skills. These utility skills will be important in keeping our damage high.
Dragon Trigger and Gunsaber

Pulling our your Gunsaber (F1) replaces your weapon skills. Each of these Gunsaber have two attacks, a slash then a ranged gun shot or explosive. They also have charges letting you use them multiple times.
Dragon Trigger does the same and has 3 Dragon Slashes to use, Dragon Slash – Force, Boost, and Reach. Each of these will end Dragon Trigger once used. The only one that should be used is Force (1) as it does the most damage.
Dragon Trigger also has Flicker Step (5) which a short-range teleport with 3 uses. Flicker Step is very useful after using Dragonspike Mine or to avoid damage. Unlike Dragon Slash, Flicker Step and Triggerguard (4) don’t end Dragon Trigger.
Rotation
According to my friend who’s a big Bladesworn main, you can mainly just wing it and hope for the best. Just go with the flow, I guess. Either way here’s a base rotation that you can loosely follow.
Use Before Fight & Off Cooldown
Rotation 1
Rotation 2
- Flow Stabilizer (7)
- Tactical Reload (0)
- Flow Stabilizer x2 (7)
- Overcharged Cartridges (8)
- Dragon’s Roar (5)
- Gunstinger (4)
- Cyclone Axe (2)
- Dragon Trigger (F2)
- Dragon Slash (1)
- Dragonspike Mine (9)
- Dragon Trigger (F2)
- Dragon Slash (1)
- Artillery Slash (3)
- Overcharged Cartridges (8)
- Sheathe Gunsaber
- Dragon’s Roar (5)
- Cyclone Axe (2)
- Axe Auto-attack chain
- Throw Axe (3)
- Dragon Trigger (F2)
- Dragon Slash (1)
- Blooming Fire (2)
- Artillery Slash (3)
- Cyclone Trigger (4)
- Gunsaber auto-attack chain
- Cyclone Trigger (4)
- Overcharged Cartridges (8)
Be sure to fully charge each Dragon Slash skill. Your charge level, Ammunition, is indicated by the bullets above your skill bar. The more Ammunition you use, the more damage you’ll deal. You should press Dragon Trigger, let it charge, then use Dragon Slash.
The playstyle of Bladesworn might be weird and difficult to get used to, but master it and you’ll be at the top of the damage charts. To look at Power Bladesworn more in-depth, here is the build editor.
Now let’s move on to Condi DPS.
Best Condi DPS Class Builds in Guild Wars 2
Condi Virtuoso (Mesmer)

Virtuoso is the End of Dragons elite specialization for the Mesmer. Instead of creating clones, Virtuosos create hovering blades which they fire at enemies. As of right now, Condi Virtuoso is one of the best DPS class builds, if not the best, in GW2.
While Virtuoso can deal an upwards of 38k DPS, that’s not what makes them strong. They have multiple ways to give themselves Block and Distortion, effectively making them immune to damage for a couple of seconds.
Along with that they have access to some of the best utility skills in the game which means incredible self-healing, stealth, teleports, and crowd control. Basically, they have everything a DPS wants and everything a team needs.
While we are covering the Condi build, Virtuoso also has a Power build which is just as effective.
Stats
Normally, for Condi builds we would use full Viper’s or Sinister’s gear. However, this time we need a lot of Precision to complement our trait choices. So, we will need:
- Viper’s – Power, Precision, Condition Damage, Expertise for weapons and 3 armor pieces
- Rampager’s – Precision, Power, Condition Damage for everything else
With this setup we will have 50% crit chance, 96% with a Fury boon. Critical Hits will be the main way we can apply conditions, made possible by our specializations.
Specializations

To make this build possible we need Dueling, Illusions, and Virtuoso.
In Dueling, we get our first bleed trait Sharper Images. This trait makes our Illusions inflict bleed on critical hits. This includes the illusory blades we control. Dueling also has Master Fencer which gives more crit chance when we critically hit an enemy.
The Illusions spec upgrades our profession skills with faster recharge times, Master of Misdirection, and additional Torment conditions, Maim the Disillusioned. Illusions also contains Compounding Power which gives bonus Condition Damage every time we summon a blade.
Lastly the Virtuoso spec contains Jagged Mind which makes our blade attacks, including Dagger skills, bleed on critical hit and our condition damage heals us. To make Bleeds better Virtuoso also has Bloodsong which increases Bleed damage by 25%.
Weapons and Skills

For Condi Virtuoso, we will use Dagger/Sword with a Focus secondary. Dagger skills are our main damaging skills with Bladecall (2) and Unstable Bladestorm (3). Be sure to use Bladestorm when you have at least 3 blades and Bladecall when you aren’t at max blades.
The only reason we have Sword and Focus is for their 5th skills, Phantasmal Swordsman and Phantasmal Warden. These will be a good source of Might, Fury and Block.
As for our utility skills, we will use full Signets for their passives and actives. The most important being Signet of the Ether (6) which reduces the cooldown of Phantasmal skills on activation. I recommend replacing Signet of Illusions (8) if you want to use a different utility skill like Null Field.
Rotation
Most of our damage is going to come from critical hits and Bleeds. To start off every fight, we’ll follow an opener rotation then prioritize using skills off cooldown.
Dagger/Sword Opener
Example Rotation
- Phantasmal Swordsman (5)
- Weapon Swap
- Bladesong Harmony (F1)
- Bladecall (2)
- Unstable Bladestorm (3)
- Phantasmal Warden (5)
- Signet of the Ether (6)
- Thousand Cuts (0)
- Bladesong Sorrow (F2)
- When at 5 blades
- Phantasmal Warden (5)
- Bladesong Harmony (F1)
- When at 5 blades
- Signet of Illusion (8)
- Bladecall (2)
- Bladesong Sorrow (F2)
- When at 5 blades
- Phantasmal Swordsman (5)
- Weapon Swap
- Phantasmal Warden (5)
- Thousand Cuts (0)
- Bladesong Sorrow (F2)
- Bladecall (3)
- Unstable Bladestorm (3)
- Signet of the Ether (6)
- Phantasmal Warden (5)
- Weapon Swap
- Phantasmal Swordsman (5)
- Bladesong Harmony (F1)
- Bladecall (2)
- Bladeturn Requiem (F5)
While you wait to resummon blades for Bladesong skills, be sure to be auto-attacking in the meantime. Once you’ve finished the opening rotation, you can create your own loop by following the priority skills. As long as you’re attacking, you’ll apply Bleed so don’t worry about using the “wrong” skills.
With plenty of damage, survivability, and utility, playing Virtuoso will be a breeze. Check out this build editor to customize this build to fit your playstyle.
Condi Firebrand (Guardian)
Firebrand is the Path of Fire elite specialization for the Guardian. These types of Guardians use Axes and mystical tomes to burn enemies to a crisp and support allies. Despite being one of the top Condi DPS classes, Firebrand also has an amazing support build which you can check out on our Guild Wars 2 Best Supports guide.
What makes Firebrand so good is very similar to what makes Virtuoso good. They have a lot going for them. Being a Guardian gives them a bunch of utility like condition cleanses, boon generation, and crowd control. They also have tons of healing through their tomes if need be.
As a DPS, Firebrands have tons of AOE skills to deal with groups of enemies. Like their support build, they excel when doing group content and actually lose out on DPS when going solo. Lets see how it all comes together.
Stats
Like Virtuoso, Firebrand is going to need a mix of gear. This time we need:
- 10 Viper’s including weapons – Power, Precision, Condition Damage, Expertise
- 5 Sinister’s – Condition Damage, Power, Precision
With our specialization, the Burns we apply will have increased duration. Due to that, we can get away with adding a few Sinister gear pieces for extra Condition Damage.
Specializations

For our specializations, we will take Radiance, Virtues, and Firebrand.
Radiance will improve the Burns we apply with Radiant Fire and Amplified Wrath. These two traits will increase our Burn duration by 20% and Burn damage by 10% respectively. Since we will be using Virtue 1 (Tome of Justice) a lot, Renewed Justice reducing its cooldown is a nice bonus as well.
Likewise, Virtues will upgrade our Virtues. Power of the Virtuous increases our Condition Damage by 13% of our Vitality and reduces the cooldown of our Virtues further. We will also take Permeating Wrath which changes the on-hit burning passive of Virtue 1 into an AOE burn that activates sooner.
Lastly, we have Firebrand which will upgrade our Tomes with Legendary Lore, giving Tome of Justice skills 20% increased Burn duration. Our final trait we will grab is Quickfire, not for giving allies buffs but to keep the Virtue 1 passive even when it’s on cooldown.
Weapons and Skills

For Condi Firebrand, we will use Axe/Torch with a Scepter as our secondary weapon.
We will spend most of our time using Axe/Torch for our damage. We basically want to use every skill off-cooldown. The most important being Symbol of Vengeance (2) which gives Fury and applies tons of Bleed. Likewise, the torch skill, Zealot’s Flame, deals tons of Burn and has multiple charges.
The only reason we switch to a Scepter is for its second skill, Symbol of Punishment. Once we use this skill we gain 4 stacks of Might then immediately switch to Tome of Justice.
As for our utility skills, Purging Flames (7), Signet of Wrath (8), Mantra of Flame (9) are important to have. With the exception of Signet, you’ll want to use these skills constantly for tons of damage. Everything else is up to you but personally I like “Feel My Wrath!” (0) for extra buffs.
Tome of Justice

Tome of Justice (F1) will a big source of our damage. Not only does it have the Virtue 1 passive we’ve been upgrading, but equipping it brings new skills. All of its weapon skills can hit multiple targets for decent damage.
Its best skill is Epilogue: Ashes of the Just (5). This skill is very important as it gives 3 stacks of Ashes of the Just to allies. This makes their attacks inflict a Burn which is affected by your stats. Be sure to group your party together because this skill is the difference between 37k DPS and 42k DPS.
Rotation
For Condi Firebrand our rotation will consist of following an opener then making sure we use priority skills.
Axe Opener
Priority Skills
- Symbol of Vengeance (2)
- Zealot’s Flame (4)
- Purging Flames (7)
- Weapon Swap
- Symbol of Punishment (2)
- Tome of Justice (F1)
- Ashes of the Just (5)
- Igniting Burst (2)
- Scorched Aftermath (4)
- Put Away Tome
- Zealot’s Flame (4) x2
- Cleansing Flame (5)
- Tome of Justice (F1)
- Igniting Burst (2)
- Put Away Tome
- Symbol of Punishment
- Zealot’s Flame (4) x3
- Tome of Justice (F1)
- Ashes of the Just (5)
- Scorched Aftermath (4)
- Igniting Burst (2)
- Searing Spell (1)
- Purging Flames (7)
- Symbol of Vengeance (2) Axe
- Mantra of Flame (8)
- Zealot’s Flame (4)
- Blazing Edge (3)
- Axe Auto-attack Chain
- Symbol of Punishment (2) Scepter
- Cleansing Flame (5)
After the Opener, always use Tome of Justice when you have 3 pages/charges. Try not to stay on Scepter for too long or you’ll lose a lot of DPS. It’s always better to be auto-attacking with the Axe rather than the Scepter.
You can’t go wrong with playing Firebrand as a DPS. You’ll do plenty of damage and can always switch a few things around to become a makeshift support if need be. If you want to customize this build further here is the build editor. As for the last DPS class on this list, lets look at the Condi Daredevil.
Condi Daredevil (Thief)

Daredevil is the Heart of Thorns elite specialization for Thief and one of my favorite DPS classes in Guild Wars 2. Daredevil uses the Staff as a melee weapon and has a bigger endurance bar, along with a new and improved dodge. However, with the Condi build we will be using Daggers. If you want to see a build that uses the Staff, check out our Daredevil builds.
Condi Daredevil is my go-to Thief build for when I want to turn my brain off and not worry about a thing. It’s a very easy build that uses dodges and skills that have dodge frames to deal most of its damage. You’ll rarely take damage, while enemies melt away from Poison and Bleed.
However, compared to other DPS classes, Condi Daredevil is a very selfish build. Besides some crowd control, group stealth, and damage, this build doesn’t offer much utility to its party. In fact, with the way Venoms work, Daredevil relies on others in order to deal as much damage as possible.
Let’s start with what stats you need.
Stats
This time around the stats we need are straight forward. The choices we have are:
- Viper’s – Power, Precision, Condition Damage, Expertise
- Sinister – Power, Precision, Condition Damage
Condition Damage and Expertise are the most important stats to grab, making Viper’s gear the best option. However, Viper’s gear might take some time to come by for a new player. Luckily you can buy a full set of Sinister gear on the market for cheap.
Specializations

For Condi Daredevil, we will take Deadly Arts, Trickery, and Daredevil.
Deadly Arts will be a big source of damage. First, we will grab Deadly Ambition to make weapon skill 3 apply two stacks of Poison with each use. Next, with Panic Strike immobilizing a foe Poisons them which works well with Devourer Venom. Last, Potent Poison will increase Poison damage by 33%.
With Trickery, we upgrade our Steal with Kleptomaniac, Bountiful Theft, and Lead Attacks. These perks will give Initiative upon stealing, steal boons, and increase all damage by 15%. We will also grab Deadly Ambush which increases Bleed damage by 25%.
Lastly, Daredevil gives bonus 7% bonus health with Maruader’s Resilience for some extra survivability. What’s really important is Lotus Training which turns our dodge into a dagger throwing flip. At the same time, we gain a buff that increases Condition Damage by 15% every time we dodge.
Weapons and Skills

The weapon and utility choices are very simple. We only need a Dagger/Dagger combo to pull this off. Beside auto-attacks, you only need to use Death Blossom (3). This skill inflicts 2 stacks of Poison and 3 stacks of Bleed per use plus has a 1/2 second of evade. This will be all we need.
As for our utility skills, we need Spider Venom (7) and Devourer Venom (8). Every time you use Venoms it applies to nearby allies, quadrupling our condition stacks and our damage. This is also why we run Thieves Guild (0) to summon allies if we need them.
Other utility skills are up to you. Some people may say that Thousand Needles (9) is a must, but I don’t personally like using it so feel free to replace it with Scale Venom or something else.
Rotation
The rotation for Condi Daredevil revolves around using Death Blossom, dodging a lot, and making sure we use our Venoms.
Opener
Basic Loop
- Prepare Thousand Needles (9)
- If using
- Thieves Guild (0)
- Spider Venom (7), Devourer Venom, (8)
- Thousand Needles (9)
- Dodge
- Death Blossom (3)
- Steal (F1)
- Death Blossom
- Death Blossom
- Dodge
- Death Blossom
- Auto-attack Chain
- Dodge
- Death Blossom
- Auto-attack Chain
- Dodge
- Death Blossom
- If you have Initiative
- Auto-attack Chain
- When you don’t have Initiative
- Prepare Thousand Needles
- Venoms when off cooldown
And that’s why Condi Daredevil is one of my favorite DPS classes to play when I just want to turn my brain off as I grind Guild Wars 2. All you have to do is use Death Blossom and dodge to get your damage out. If you want to give Condi Daredevil a try, check out this link to customize this build further.
Join the High Ground!
And that wraps up the best DPS class & build options in GW2. While these classes will deal the most possible damage, there are loads of other builds that are just as viable. Leave a comment down below and tell us your favorite DPS class/build and subscribe to our newsletter for more Guild Wars 2 content.
And as always, take the High Ground!


You must sign in to comment.
Don't have an account? Sign up here!