
Image: ArenaNet via HGG / Tyler Locke
Tyler is a psych graduate turned freelance writer and one of the newest additions to the HGG team. They currently write guides for a variety of gam... Read more
Reviewed by Benjamin Barr
The PVP Season 36 of Guild Wars 2 came with a few buffs and nerfs to a number of classes and builds. Some builds got weaker while others got stronger, and some are completely defining the current meta. If you want to see how your main class and its builds are doing check out our GW2 Best PVP Classes for a quick overview of what’s strong and what’s not.
As of right now, Elementalists are taking over the meta with great DPS or support options. In fact, both of these are so strong that they indirectly make other builds weaker due to how much projectile denial they have. Additionally, Warriors, despite the nerfs, still have two of the best duelist builds in the game.
Wondering what makes these builds so good? Well, let’s see what the top 4 GW2 PVP builds look like, then check out some honorable mentions that are just as viable in the current meta.


The 4 Best GW2 PVP Builds
Our list is in no particular order. All of these builds are considered top-tier currently, and shine in their own unique situation.
Fresh Air Catalyst

The Elementalist is taking over GW2 PVP with two extremely strong builds. The first is the Fresh Air Catalyst. Despite receiving a few nerfs, this PVP build still has tons of damage, survivability, and utility. If you’re an Elementalist main, then you’ll be having fun for the rest of the season.
What makes this build so strong is the trait from the Air specialization, Fresh Air. This trait refreshes the Air Attunement every time you deal a critical hit. With high crit chance this lets you switch back to Air Attunement every few seconds. In practice, you can easily deal loads of damage in very little time.
What’s more, this build actually defines the current meta due to the Elementalist’s skills that block and reflect projectiles. Since its already strong and popular, builds like Deadeye that rely on projectile attacks are easily countered and thus weaker.
If this sounds like a fun build, lets see what makes up the Fresh Air Catalyst and score some easy wins. Follow along with the guide with this build editor and make some personal adjustments if need be.
Stats
The PVP Amulet we want is the Berserker Amulet. With Power, Precision, and Ferocity we will deal tons of damage while most of our traits will keep us alive. However, if you find yourself taking a lot of damage easily you could swap for the Marauder Amulet for extra health.
Additionally, we want Runes of Divinity on our armor for + All Stats and an extra 10% health bonus.
Specializations

As for specializations we want Air, Arcane, and Catalyst.
Air contains the Fresh Air trait which makes this build possible. With Fresh Air, critical hits will reduce the cooldown on Air Attunement allowing us to switch to it faster. We will also take One with Air and Raging Storm for Superspeed and bonus crit damage.
Next with Arcane we gain a lot of boons for just switching attunements. First, we will take Renewing Stamina to gain Vigor on critical strikes. Then Final Shielding to gain a shield that blocks attacks when we use elite skills. Lastly, we will take Evasive Arcana to automatically cast a skill when dodging.
Lastly, Catalyst will be another big source of boons. We will take Energized Elements to gain energy and Fury when switching attunements. Next, Spectacular Sphere makes your jade sphere grant boons to allies. And last, we grab Stanch Auras which gives auras Stability which is very useful for PVP and easy due to the Elemental Epitome minor trait.
Weapons and Utility

Our weapons of choice will be the Scepter/Focus combo. As an Ele, we only have one weapon set, but in return we have 4 elements each with their own 5 skills. To keep it simple remember:
- Fire = Damage/Burning
- Water = Support/Utility
- Air = Damage/Utility
- Earth = Defense/Utility.
Some skills to note are Weapon Skill 4 in the Air and Earth attunement. Swirling Winds and Magnetic Wave block and reflect projectiles. Additionally, Weapon Skill 5 in each attunement is some sort of defensive skill or crowd control.
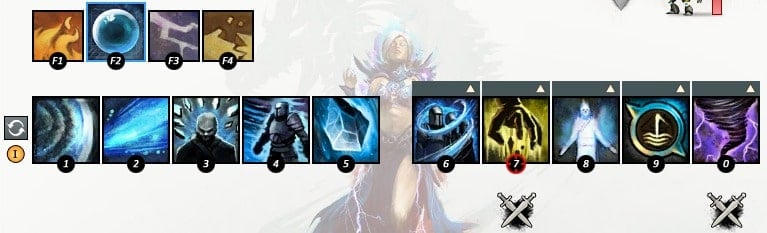
As for our utility skills, the must haves are Signet of Restoration (6) for passive healing, Lightning Flash (8) for mobility, and Signet of Air (9) for its passive movement speed and to blind enemies who get near. We also want Elemental Celerity (0) to recharge our skills when we need extra survivability or burst.
Alternatively, you could use Aftershock for more projectile denial or Signet of Fire for near 100% crit chance.
Rotation
With our specializations and weapons combined we create a fully ranged build that can burst people down quickly and often. While there isn’t a full rotation, there are a few combos that deal tons of damage:
Fire Attunement
Earth Attunement
Water Attunement
- Jade Sphere (F5)
- Fire Shield (5)
- Dragon’s Tooth (2)
- Phoenix (3)
- Air Attunement (F3)
- Lightning Strike (2)
- Jade Sphere
- Rock Barrier (2)
- Hurl (2)
- Air Attunement (F3)
- Before Hurl hits
- Lightning Strike (2)
- Shatter Stone (2)
- Water Trident (3)
- Air Attunement (F3)
- Lightning Strike (2)
Otherwise, you’ll mainly look to switch to Air whenever you deal a critical strike, use skills then switch to another element and repeat. Don’t forget to utilize your Jade Sphere (F5) for extra boons and the combo fields it creates.
Auramancer Tempest

We have another Elementalist build with the Auramancer Tempest. While the Fresh Air Catalyst was built for big damage, this Tempest build is purely a support. Just like how Fresh Air Catalyst is one of the better DPS builds, Auramancer Tempest is one of the best support builds in GW2 PVP at the moment. Why?
Well, Tempest basically has everything a support could ever need. It can heal, reduce allies damage taken, cleanse conditions, deny projectiles and even has plenty of crowd control. It also has multiple auras to share with their team at a push of a button. This lets Tempest be the perfect support for keeping allies alive and setting up kills in team fights.
Click here to follow along with the guide and lets see just how to build and play the Auramancer Tempest.
Stats
For our amulet, we will want the Avatar Amulet. This will give us plenty of Power and Precision for a bit of damage and Healing Power and Vitality for support and staying alive. Luckily a lot of our Healing Power and Concentration will come from our chosen specs so we can grab a bit of damage.
To compensate for our Amulet choice, we also want to install Runes of the Dolyak into our armor. With these runes we will have tons of Toughness and Vitality plus some health regen to help keep us alive. We will need as much survivability as possible since we have very little mobility.
Specializations

Moving on to specializations we want Earth, Water, and Tempest.
With Earth, you’ll have around 17% strike damage reduction, keeping you nice and tanky. We will want to grab Elemental Shielding first so our Auras will also give Protection. Next we will grab Earthen Blessing and Stone Heart to decrease duration of impairing conditions and be immune to critical hits while attuned to Earth.
Next, Water has Soothing Mists to heal allies around us every 10 seconds plus a 15% healing buff. We can also grab Stop, Drop, and Roll and Cleansing Wave to cleanse allies when dodging and attuning to water. More importantly, we will grab Powerful Aura to give allies an Aura when we gain an Aura.
Lastly with Tempest, we gain bonus Concentration and buffs to our Overloads. The two must have traits here are Unstable Conduit and Elemental Bastion. With these, using Overloads will grant an Aura then heal the affected allies.
Weapons and Utility
Our weapon combo of choice will be the Dagger/Focus. As with any Elementalist build you have 4 Elements each with 5 weapons skills each. To keep it simple:
- Fire = Damage/Burning
- Water = Healing/CC
- Air = CC
- Earth = CC/Defense.
Besides Overloads, Dagger/Focus have a few quick ways to create Auras. Fire Shield (5) in the Fire element gives a Fire Aura that grants Might. Air’s weapon skill 3, Shocking Aura, gives a Shocking Aura that stuns attackers. Lastly, weapon skill 3 of the utility skill Earth Shield also gives a Magnetic Aura which reflect projectiles.
Speaking of utility skills, the must haves are “Wash Away the Pain” (6), Conjure Earth Shield (7), and Glyph of Renewal (9). With these you can quickly heal allies, have emergency defense, and revive allies. Everything else is up to you.
Rotation
There really isn’t a rotation for Auramancer Tempest. Do your best to read each skill and understand which element is best for each situation. In general, Water is great for healing and cleansing allies. However, try to not stay too long in Water. Instead, switch to it then switch out when you can.
Use the Earth element to take advantage of its damage reduction and self-defense tools. Magnetic Wave (4) cleanses and reflects projectiles. Likewise, Obsidian Flesh (5) makes you immune for 3 seconds.
Air on the other hand is great for locking down enemies. You have Gale to CC an enemy from range and let your allies finish the job. You also have Shocking Aura (3) to counter any melee that comes close and can be activated again for an AOE stun.
It might sound overwhelming, but as long as you keep your allies alive through heals or auras and try to set up kills, you’ll do just fine.
Core Guardian

Our next build we have is another support and perfect for F2P players, the Core Guardian. Core Guardian is probably one of the best Guardian builds for PVP and has been pretty solid for the lifetime of GW2. Like the Auramancer Tempest, Core Guardian has everything a support could want.
With healing, defensive boons, condition cleanses, and even a revive, you’ll be able to support your team with ease. However, what separates the Core Guardian from other supports is its ability to grant Aegis to allies. With the Aegis boons your teammates will be able to block just about any attack.
To see what you need to achieve this build click here and follow along.
Stats
Just like Tempest, we want an Avatar Amulet for the Healing Power and Vitality along with some extra damage. Additionally, we want to install Runes of the Soldier for extra Vitality, Toughness, and condition cleansing.
Specializations

For our specializations, we will take Honor, Valor, and Virtues.
With Honor we get a little bit of bonus healing when dodging with Selfless Daring. To make reviving easier, we will choose Protective Reviver which creates a projectile shield around the ally being revived. More importantly, we will grab Pure of Voice to reduce the cooldown of Shouts, our main support.
Next, Valor gives us some survivability by granting defensive boons when blocking. The major traits we will take are Smiter’s Boon for more cleanses and Stalwart Defender for Toughness and Shield cooldown. We will also take Altruistic Healing to heal ourselves when supporting others.
Finally, we will take Virtues to power up our own Virtues. The two big traits here are Absolute Resolve and Indomitable Courage. The first will buff the passive AOE healing from Virtue of Resolve and remove conditions on activation. The second turns Virtue of Courage into a stun break.
Weapons and Utility

For our weapons we want a Staff plus a Sword/Shield combo. With the Staff we get loads of support options. For instance, Holy Strike (2) is an AOE heal over time which also damages enemies. Empower (4) is also a good skill that not only heals but grants Might to your allies.
When you aren’t using Staff, you’ll be using Sword/Shield for damage and defense. Zealot’s Defense (3) and Shield of Absorption (5) are great for countering projectiles, as they create areas of denial. Shield of Judgement (4) is also a great skill that gives Protection and Aegis to you and allies.
As for utility skills, we want the Shout Healing skill Receive the Light (6) for big heals. We also want Advance (8) for instant Aegis and Swiftness for allies. Likewise, Stand Your Ground (7) is a great stun break and instant Stability for teammates. Lastly, we also want Signet of Mercy for passive Concentration and an instant revive. The elite skill is up to you.
How to Play
Unfortunately, as with any GW2 PVP build there isn’t really a rotation to follow. Use Staff to heal and buff allies whenever needed. Otherwise, use your Sword/Shield to counter projectiles and provide Aegis plus Protection.
Be sure to use your utility skills at the right times. Receive the Light heals in pulses for a lot so be sure to use it when allies are taking consistent damage. Use Stand Your Ground either to break out of stuns or prepare for an enemy push. Likewise, Advance is great for pushing the enemy or for instant Aegis.
Lastly, your Virtues are just as useful. While their passives are strong so are their actives. Virtue of Justice is great for buffing ally attacks and should probably be used often. Virtue of Resolve is a great emergency cleanse and heal. Virtue of Courage can be great for instant Aegis on allies around you.
As long as you press your buttons and keep people alive, you’ll do just fine.
Defense Spellbreaker

Lastly, we have Defense Spellbreaker. Despite receiving a few nerfs, this Warrior build is still one of the best duelist builds in GW2 PVP right now. With plenty of damage, defense, condition cleanses, and crowd control, you can 1v1 just about anyone with ease.
A lot of this build’s power comes from its Defense spec, hence the name. With the Defense spec, you gain tons of damage reduction and self healing, along with a 10% damage bonus. Combine this with the Spellbreaker’s Full Counter mechanic, and its going to take a lot to take you down.
If you’re looking for a solid solo queue PVP build, Defense Spellbreaker should be right up your alley. Click here for the full build and follow along.
Stats
As with any DPS build, we want our amulet to be the Berserker’s Amulet. Then to compensate for building full damage, we will install Runes of Divinity for +All Stats and 10% Maximum Health. With this we will deal enough damage to be a threat and have enough health to stay alive.
Specializations

For our specializations we want Defense, Discipline, and Spellbreaker.
With Defense we gain great traits for survivability. By default we get Protection when using a healing skill, 10% damage reduction, and health regen. The two must have major perks are Cull the Weak for a10% damage increase and Cleansing Ire for condition cleansing.
Next with Discipline, we gain Might for weapon swapping and weapon swapping is on a shorter cooldown. The major traits we want are Warrior’s Sprint for 25% movement speed and another 10% damage buff. We also want Brawler’s Recovery for more cleanses. Lastly, we will take Burst Mastery so Burst skills deal 7% more damage and grant Swiftness.
Lastly, with Spellbreaker your Dazes, Stuns and Pulls remove boons and give stacking bonus stats. This works well with the second major trait, Loss Aversion, which adds bonus damage when you remove boons. The other two major traits we want are No Escape so our Dazes immobilize and Magebane Tether to chain ourselves to targets so they can’t escape.
Weapons and Utility

For our weapons, we definitely want Dagger/Shield and a Greatsword secondary. While Dagger/Shield sounds like an odd combo, it actually has a lot of damage and utility. For instance, Disrupting Stab (3) and Shield Bash (4) Daze and Stun opponents, triggering a lot of Spellbreaker’s traits. It also has an on demand 3 second block with Shield Stance (5)
Greatsword on the other hand deals decent damage and has a bunch of mobility to engage or chase targets. For instance, it has Rush (5) and Whirlwind Attack (3) both damaging dashes. It also has Hundred Blades (2) which deals around 3k damage and hits multiple enemies.
As for utility skills, we’ll want Mending (6) as our healing skill to remove up to five conditions. We also want Shake it Off (7) and Endure Pain (9) for an AOE cleanse, two stun breaks, and 4 seconds of damage immunity. The rest is up to you, but I recommend Bull’s Charge (8) to guarantee high damage skills hit.
Rotation
A lot of the playstyle of Spellbreaker is taking advantage of Magebane Tether to stay on targets while utilizing your high damage Burst skills (F-keys). With this you have a few combos:
Dagger Start
Greatsword Start
- Disrupting Stab (3)
- Shield Bash (4)
- Weapon Swap
- Arcing Slice (F1)
- Bull’s Charge (8)
- Hundred Blades (2)
- Weapon Swap
- Breaching Strike (F1)
- Aura Slicer (2)
- Bladetrail (4)
- Rush (5)
- Whirlwind Attack (3)
- Weapon Swap
- Aura Slicer (2)
- Disrupting Stab (3)
- Shield Bash (4)
- Breaching Strike (F1)
- Weapon Swap
- Arcing Slice (F1)
- Full Counter (F2)
- Arcing Slice (F1)
As long as you loosely follow these combos you’ll have an easy time getting kills. The best thing about playing Defense Spellbreaker is its adaptability and as you play you’ll be able to modify these combos to fit the situation.
Honorable Mentions
And that wraps up the top 4 PVP builds in GW2 at the moment. However, there are few decent builds that deserve some quick praise and mention, starting with the Chronomancer.
Bunker Chronomancer

The first honorable mention is the Bunker Chronomancer. This build is considered pretty overpowered not because it deals tons of damage, but because of how hard it is to kill. As the name suggests, Bunker Chronomancers like to bunker down and stall out capture points until their team arrives.
It achieves this with loads of skills that give Aegis, blocks, and Invulnerability. Combine this with high Alacrity uptime, and the Chronomancer can constantly use said skills to increase their survivability. They also can apply these defensive boons to allies, making them great for group play and a nightmare to play against.
Dagger/Pistol Daredevil

While the Thief’s best build (in my opinion), Deadeye, is countered by the top meta picks, Daredevil still has a great PVP build to play. In fact, it is probably one of the best roamer builds for PVP in GW2.
The Dagger/Pistol Daredevil deals loads of damage by utilizing stealth and its mobility to quickly assassinate targets then get out. With tons of teleports, stun breaks, and condition cleanses, this build is hard to lock down making it the perfect assassin roamer.
In the right hands, you can fully control the map by taking out targets or splitting the enemy team by capturing other control points.
Burst Gyro Scrapper

The last honorable mention we have is the Burst Gyro Scrapper. This build is a high-risk, high-reward roamer who sacrifices survivability for high damage. Like the Thief, it prefers to try and control the map through capturing points or providing backup to team fights.
With its access to near permanent Superspeed, Scrapper can zoom around the map to where it needs to be. Then, using Grenade Kit, it can deal tons of AOE damage from range to quickly burst down enemies.
However, it takes a skilled player to find success, as it has very few stun breaks or condition cleanses. Due to this, it makes it incredibly easy to lock down and focus a Burst Gyro Scrapper.
Join the High Ground!
And that wraps up the best PVP builds in GW2! What are your favorite builds to run for Season 36? Have you found any counters to the top meta picks yet? Leave a comment down below! Also subscribe to our newsletter so you don’t miss out on any of your favorite content.
And as always, take the High Ground!


You must sign in to comment.
Don't have an account? Sign up here!